On this page, we walk through explanations of all the settings available to you in WooCommerce.
You’ll find information about configuring General WooCommerce settings as well as Product, Tax, Payments, Shipping, Accounts, Email, API, and Webhooks.
Navigate to WooCommerce > Settings to get started.
General Settings
↑ Back to topWhen you first navigate to WooCommerce > Settings, you’ll see the general settings for your store. These include Store Address, General Options, and Currency Options.
Below you’ll find brief explanations of each:
Store address
↑ Back to topDefines your shop’s address country and state, where you are based as a seller. It determines default tax rates and customer locations.
General options
↑ Back to topSelling Location(s) – choose to sell to all countries or to specific countries. You can choose multiple specific countries / regions.
Shipping Location(s) – choose to ship to only those countries you sell to or a subset of countries. You can also disable shipping and all shipping-related functionality.
Default Customer Location – Select the assumed location of site visitors before they input it, in order to calculate tax and shipping.
- Shop base address tells the system to assume they are in the same location as your shop.
- No Address means that taxes and shipping aren’t calculated until a customer enters their address.
- Geolocate address verifies customer’s current location and calculates taxes and shipping accordingly.
- Geolocate with page caching support is the same as above, but does the geolocation via Ajax. You may notice your website URLs have a ?v=xxxxx appended to them. This is normal to prevent static caching of prices.
Enable Taxes – enable or disable taxes on your store. Disabling taxes hides the tax settings page.
Enable coupons – enable or disable coupons in your store. Coupons are applied from the admin edit order screen (for unpaid orders), cart, and checkout pages.
- Enable the use of coupon codes – select to enable the use of coupons in your store.
- Calculate coupon discounts sequentially – changes the coupon calculation logic to apply coupons in sequence on top of one another, rather than basing them on the original product prices.
Currency options
↑ Back to topCurrency options determine how prices are displayed in your store for customers. Below you’ll find a brief overview of the settings. If you want more information about currency settings click here: Shop Currency.
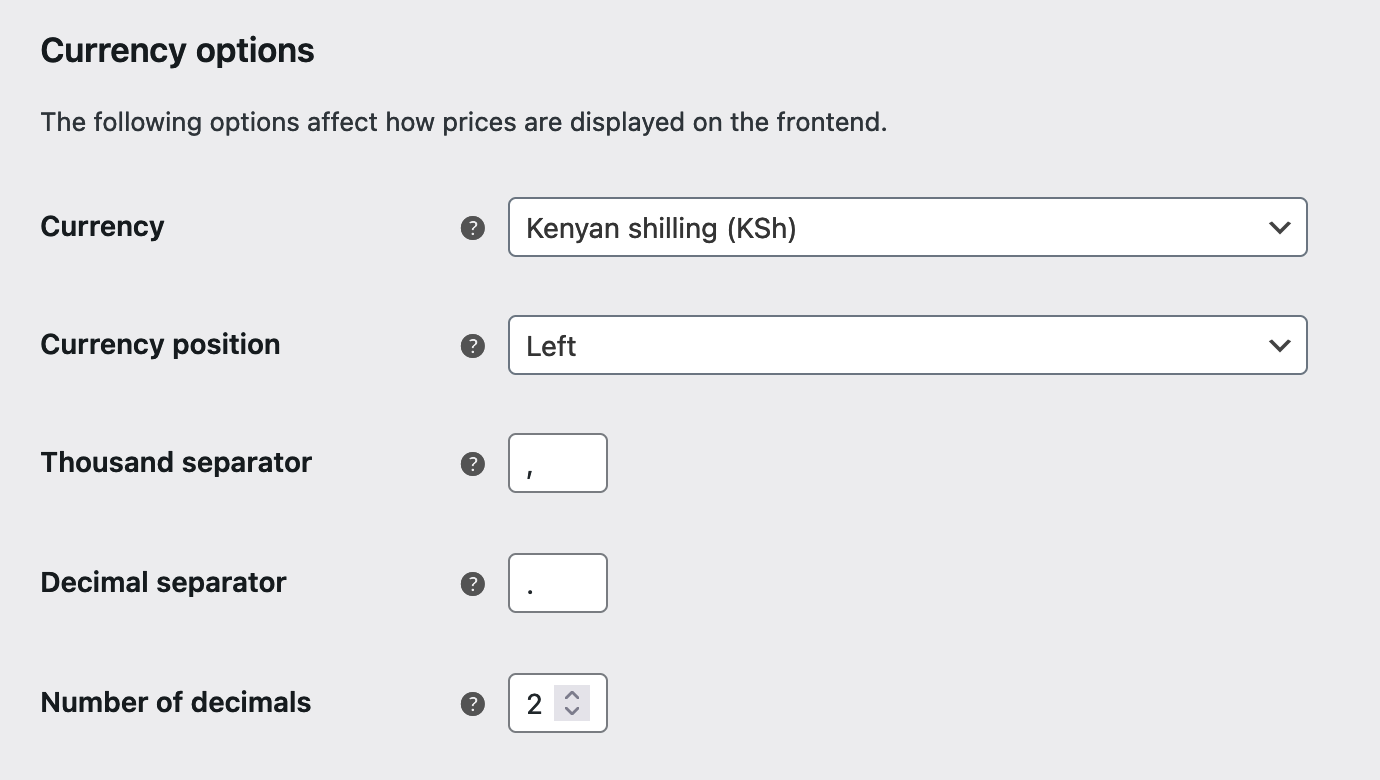
Currency – choose the default currency for the store. Only one may be selected.
Currency Position – choose the default currency position for prices: Left, Right, Left/Right with space
Thousand Separator – choose the symbol to use for the thousand separator: 1,000 or 1.000
Decimal Separator – choose the symbol to use for the decimal separator: 100.00 or 100,00Number of Decimals – choose how many numbers to display to the right of the decimal when displaying prices: 100.00 or 100
Products Settings
↑ Back to topClicking on the Products tab at the top of the page takes you to the Product Settings. These settings are for products and how they are displayed, including image sizes, inventory, and downloadable product settings.
Below you’ll find a general overview and explanation of the settings. If you need more information about adding and managing products, read our Adding and Managing Products documentation.
General
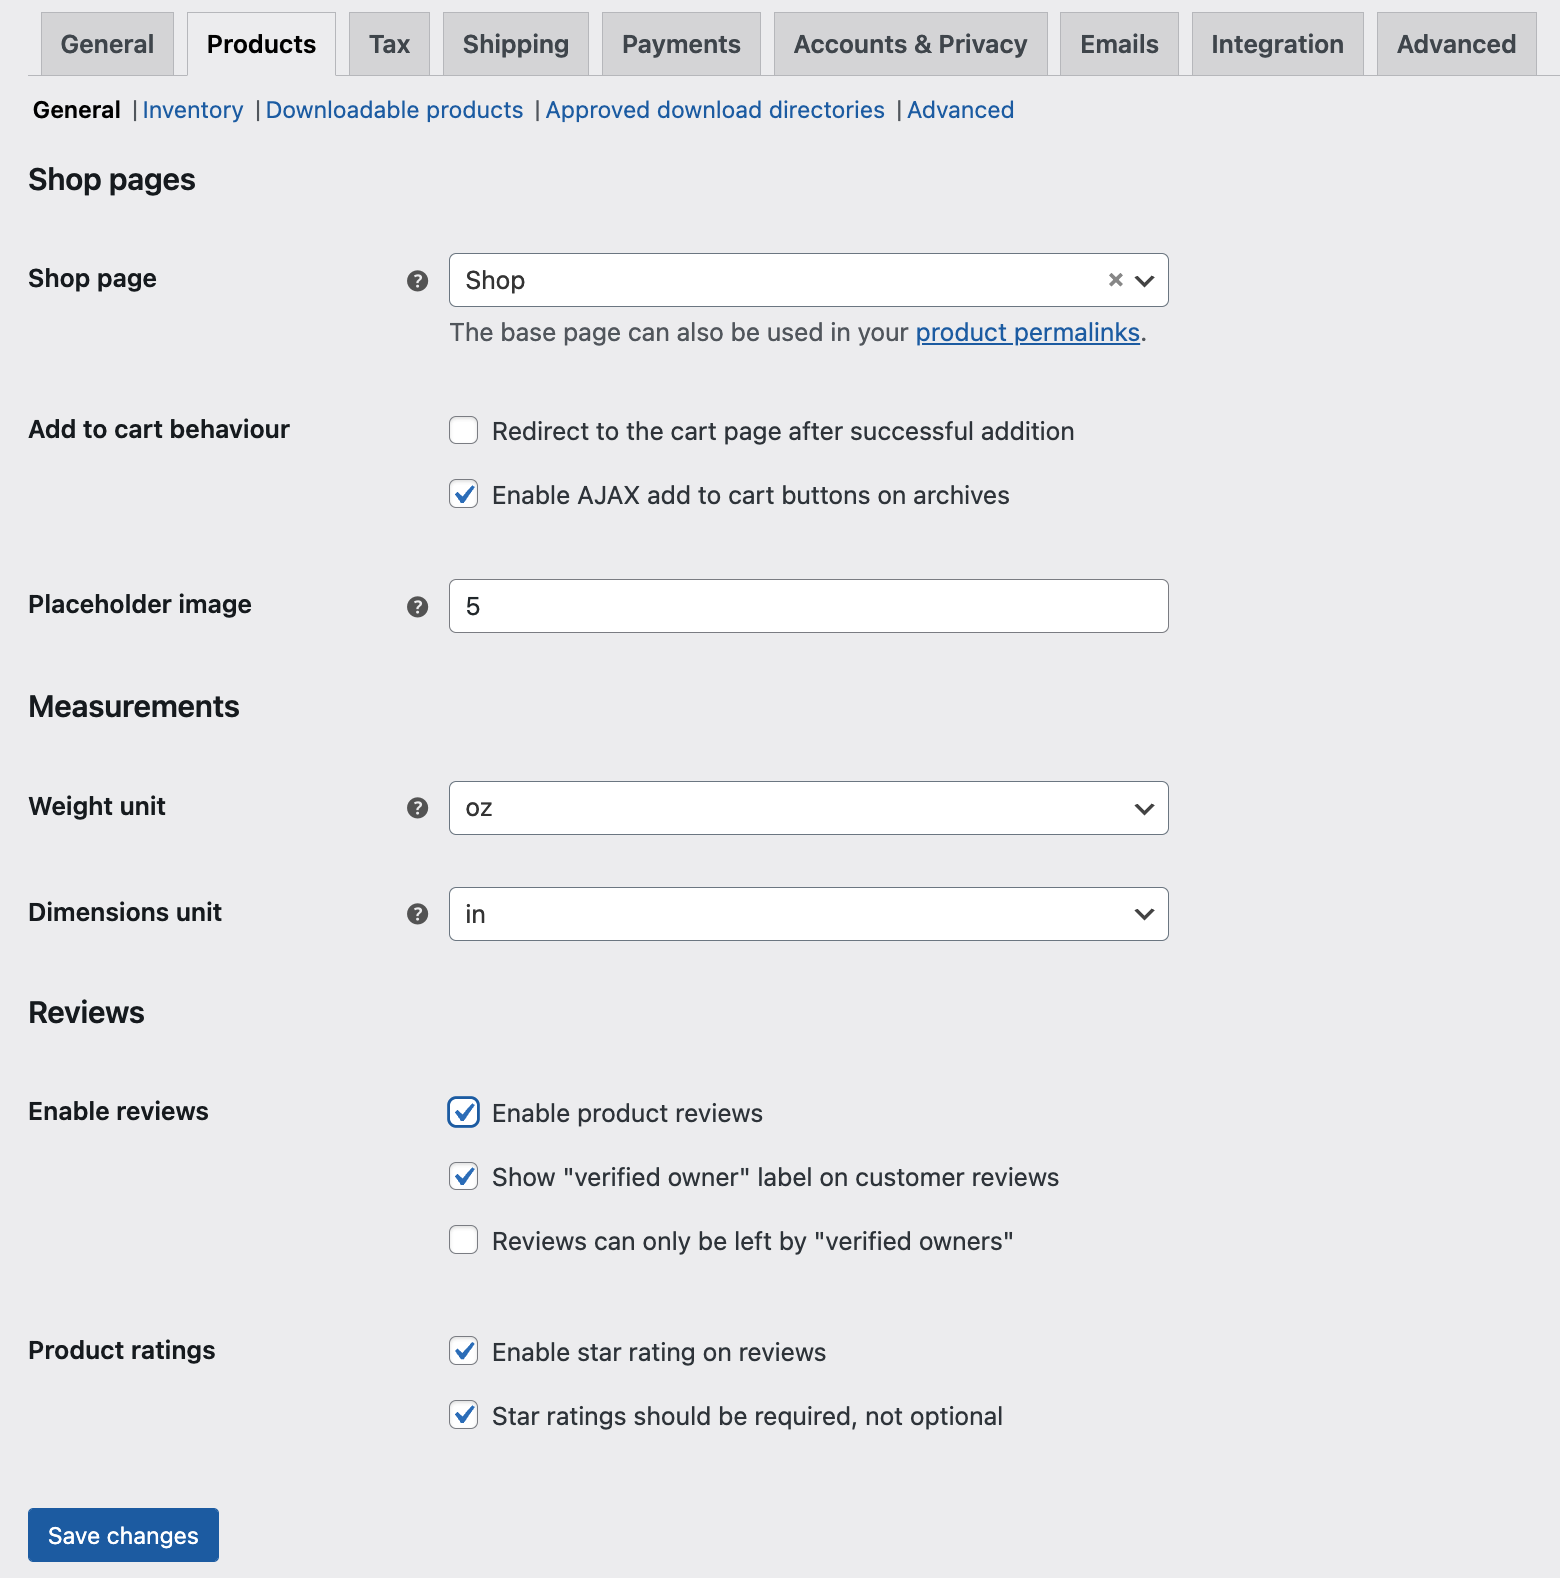
↑ Back to topIn the General section (WooCommerce > Settings > Products > General) are settings for Shop Pages, Measurements, and Reviews.
Below is a brief description of each of the settings you’ll find in this menu:
Shop pages
- Shop Page – select what page you want to be the default shop page. It doesn’t need to be the Shop page that WooCommerce installed, or can be skipped if you use another method to display products.
- Add to cart behavior – determines what happens after a customer clicks the Add to Cart button.
- Redirect to cart page after successful addition – Automatically takes the customer to the cart page upon adding a product.
- Enable Ajax add to cart buttons on archives – Adds the ‘Add to Cart’ option to shop archive pages.
Placeholder Image – set a default placeholder image to appear on the front end when no other image is available. This could be your brand logo or an image of a signature product or service.
Measurements
- Weight unit – Select a unit of measurement for products from the drop-down for weight.
- Dimensions unit – Select a unit of measurement for products from the drop-down for dimensions.
Reviews
- Enable Reviews:
- Enable Product Reviews Reviews – Tick this box to activate product reviews.
- Show “verified owner” label on customer reviews – Tick this box to display when a customer review is from a customer who has purchased the product.
- Reviews can only be left by “verified owners” – Tick this box if you want to restrict everyone except for product buyers from leaving reviews.
- Product Ratings
- Enable star rating on reviews: Tick this box to enable star ratings on reviews.
- Star ratings should be required, not optional: Tick this box to make star ratings required to leave a review.
Read more about how to manage and moderate Product Reviews.
Inventory
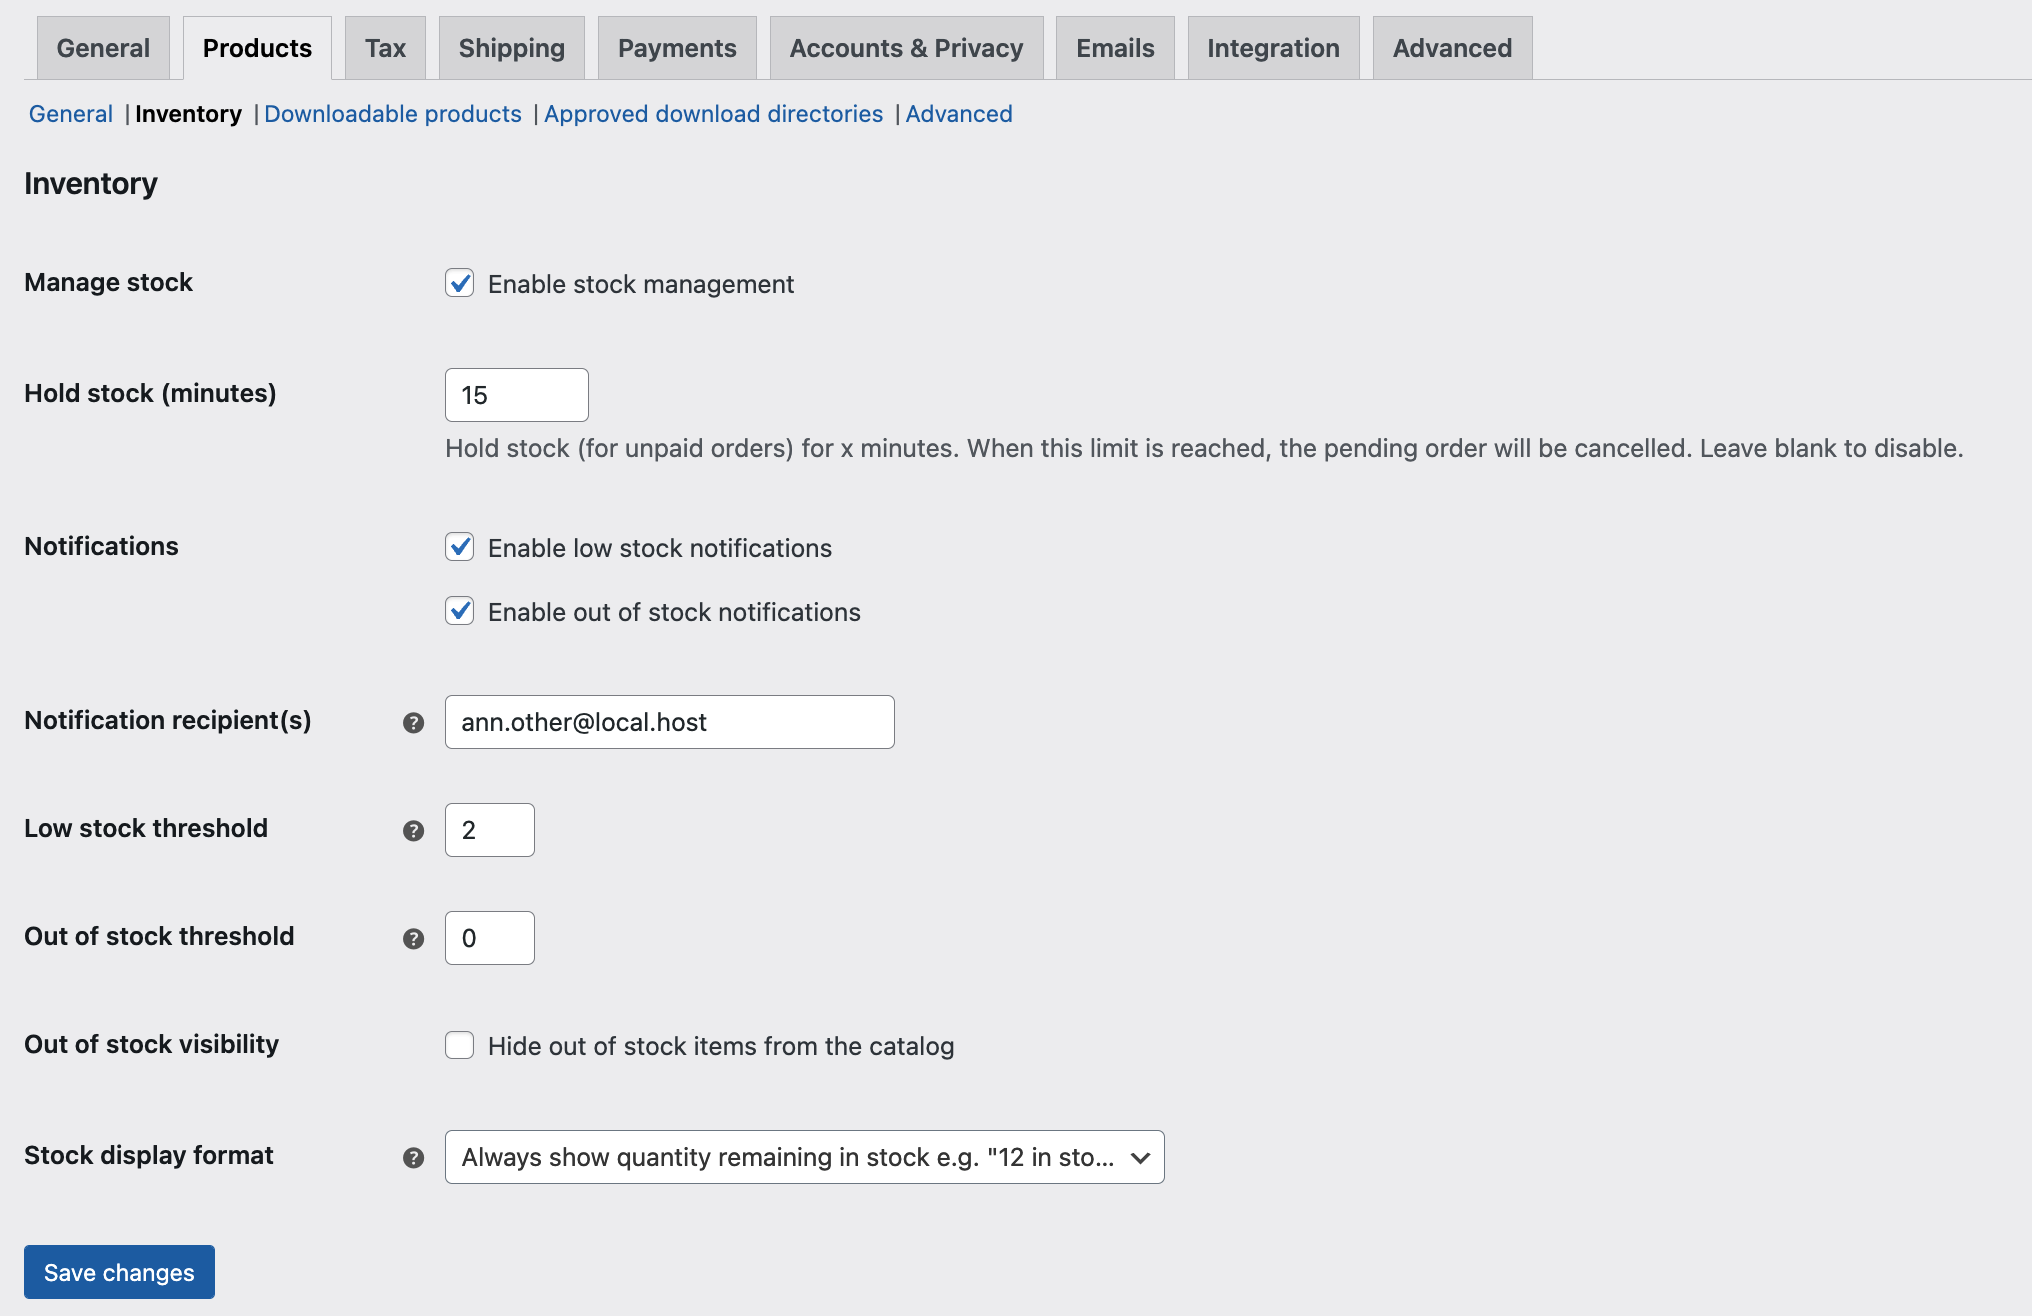
↑ Back to topClicking on the “Inventory” link (WooCommerce > Settings > Products > Inventory) at the top of the screen takes you to the store’s inventory settings. Below is a brief description of each of the settings you’ll find in this menu:
Choose whether to enable stock management. If selected, you have these options:
Manage stock
- Enable stock management – Tick this box to enable auto-managed inventory for physical products. You enter quantity, and WooCommerce subtracts items as sales are made, displaying: Stock, Out of Stock or On Backorder. More info at: Stock Management Improvements.
- Deactivate (box left unticked) – Inventory and status for physical products must be entered manually. You can still Enable Stock Management on a per-product level if desired. More info at: Managing Products.
Hold Stock (minutes) – Hold products (for unpaid orders) for X minutes. When limit is reached, the pending order is canceled. Leave blank to disable. Please note that this will work for orders in the “Pending payment” status, but not “On hold”.
Notifications
- Enable low stock notifications – tick this box to enable low stock notifications (emails) to be alerted when stock of a product falls to the low-stock threshold.
- Enable out of stock notifications – tick this box to enable out of stock notifications (emails) to be alerted when a product is out of stock.
Notification Recipient – Enter the email address that receives the notifications.
Low Stock Threshold – Enter the number of products that triggers low stock notifications
Out Of Stock Threshold – Enter the number of products that triggers out of stock status/notifications.
Out Of Stock Visibility – Tick this box to hide out of stock items from the store catalog/customer view.
Stock Display Format – Select one of the following options for how the number of products in stock is displayed or choose to not display it:
- Always show stock – “12 in stock”
- Only show stock when low – “Only 2 left in stock” vs. “In stock”
- Never show amount
Note: by default “In Stock” will only be displayed on the product page if a product’s Track stock quantity option is enabled under the Inventory tab. The snippet below can be used to force the display of “In Stock” for products that are in stock, even if the quantity is not tracked.
The snippet is provided as is. However, we are unable to provide support for customizations under our Support Policy. If you need to customize a snippet, or extend its functionality, seek assistance from a qualified WordPress/WooCommerce Developer. We highly recommend Codeable, or a Certified WooExpert.
wc-core-in-stock-quanity-not-tracked.php content:
<?php

add_filter( 'woocommerce_get_availability', 'custom_override_woocommerce_show_in_stock', 10, 2 );

function custom_override_woocommerce_show_in_stock( $availability, $product ) {

    if ( ! $product->managing_stock() && $product->is_in_stock() ) {
        $availability['availability'] = __( 'In Stock', 'woocommerce' );
    }

    return $availability;
}
Downloadable Products
↑ Back to topClicking on the “Downloadable Products”(WooCommerce > Settings > Products > Downloadable products) link at the top of the menu takes you to the settings for how your store handles downloadable products.
Below are brief descriptions of the settings on this page, if you want a more in depth overview of downloadable product handling, checkout the Digital/Downloadable Product Guide.
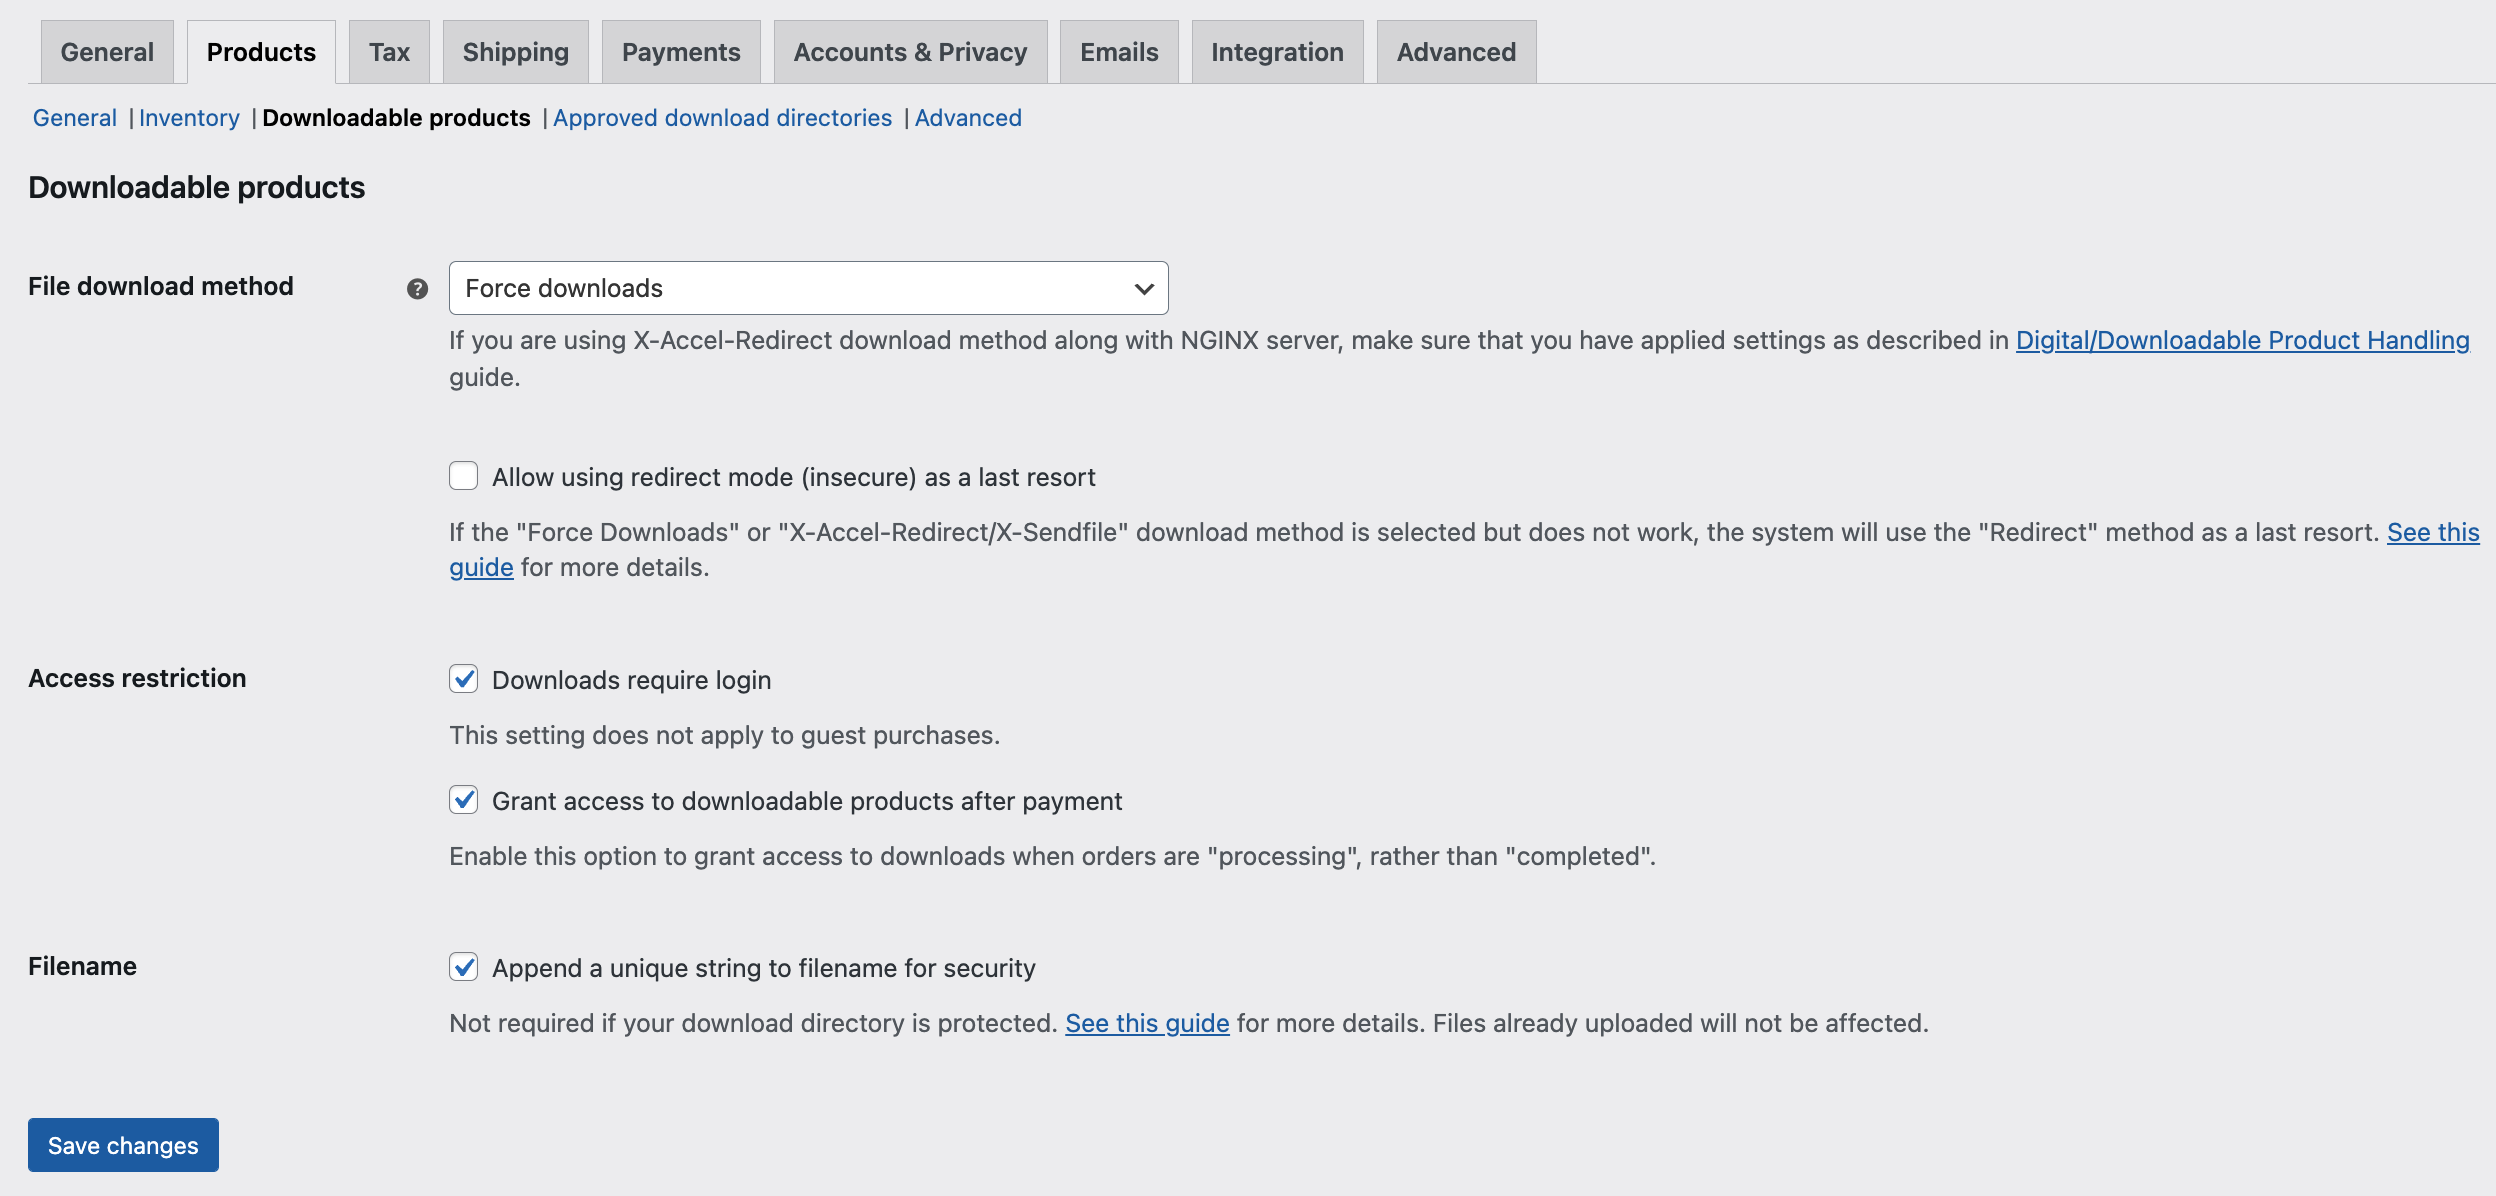
File Download Method – Controls how your store provides downloadable files to purchasers.
- Force Downloads – Files are ‘forced’ to download via a PHP script. Files are not accessible to anyone but purchasers, and direct links are hidden.
- X-Accel-Redirect/X-Sendfile – Similar to ‘forced’ above, but it has better performance and can support larger files. It requires that your hosting provider supports either X-Sendfile or X-Accel-Redirect, so you need to check with them first.
- Redirect only – A download URL links the user to the file. Files are not protected from outside access.
Most stores should use one of the first two methods to keep files safe from outside access. Redirect should only be used if you encounter problems or don’t mind downloads being non-secure.
Access Restriction
- Downloads require login – Tick this box to require customers to login in to download their purchases. Does not apply to guest purchases.
- Grant access to downloadable products after payment – Tick this box to grant access to downloads when orders are Processing, rather than Completed.
Filename
- Append a unique string to filename for security – Tick this box to add additional randomness (security) to the filename to prevent link sharing.
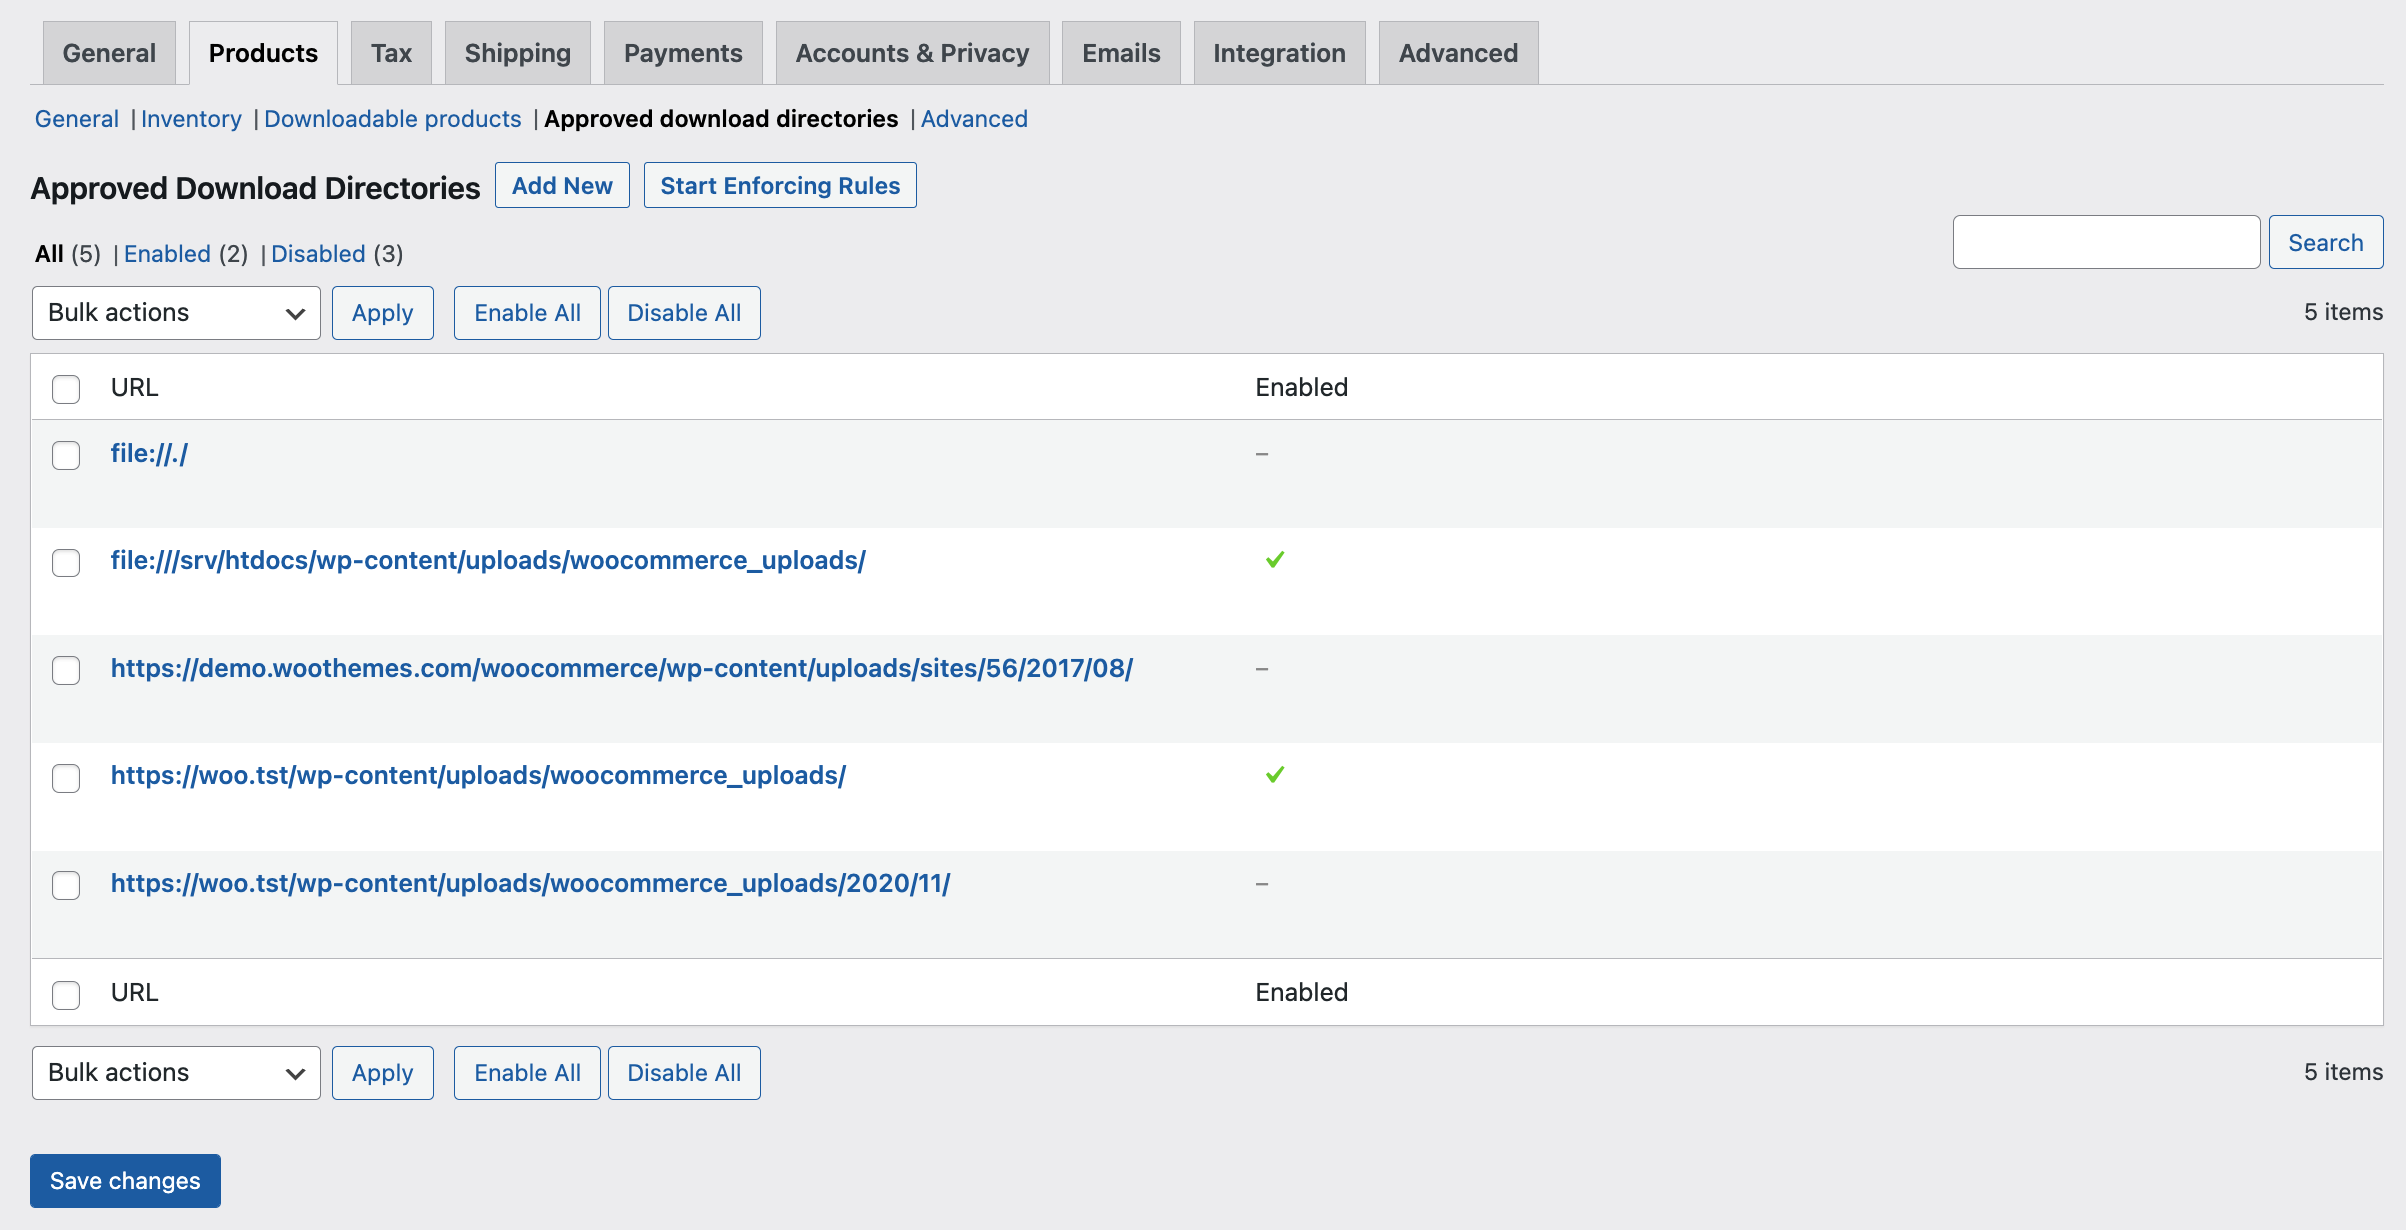
Approved download directories
↑ Back to topStarting with WooCommerce 6.5 it will be possible to take advantage of a new feature called Approved Download Directories(WooCommerce > Settings > Products > Approved downloadable directories) to help manage the storage of downloadable product files. Find a detailed overview of this new feature here.
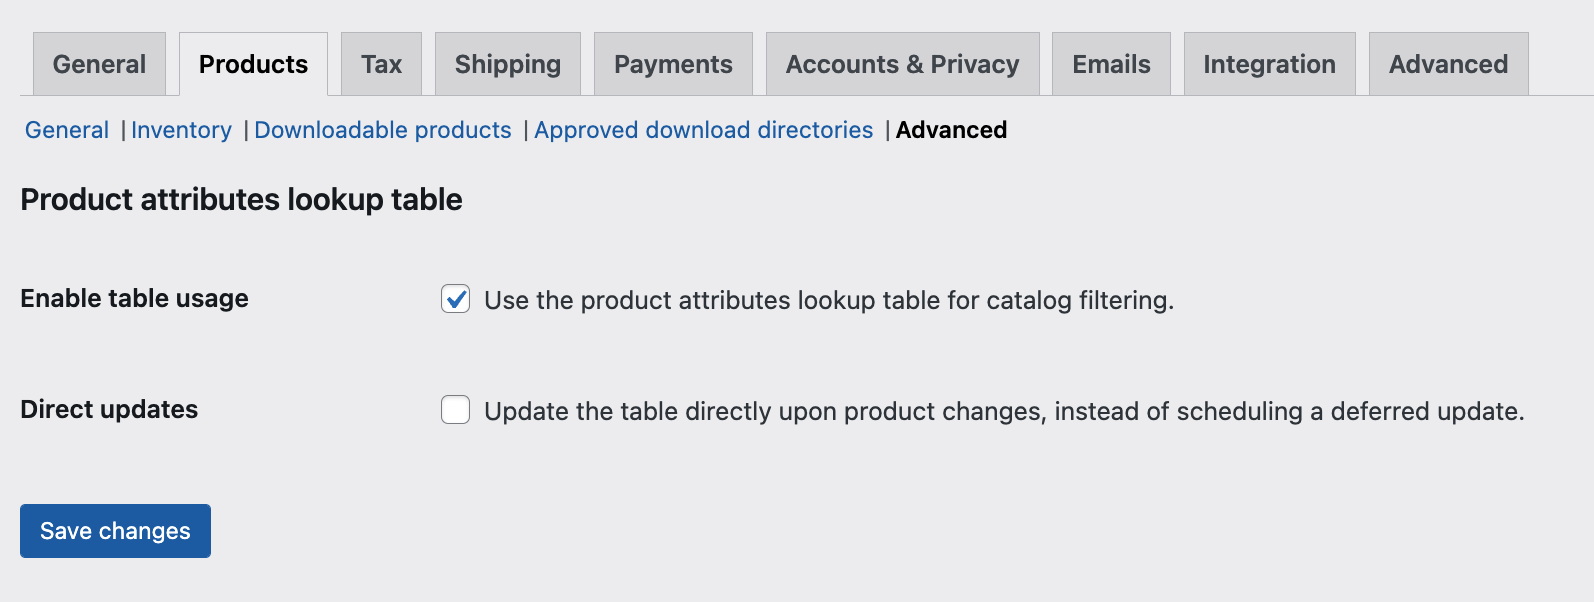
Advanced
↑ Back to topSettings related to how your store utilizes the attributes lookup table feature. For most users, the default settings are fine and will not need to be changed. Click here for technical details about this feature.
Go to: WooCommerce > Settings > Products > Advanced.
Tax Settings
↑ Back to topGo to: WooCommerce > Settings > Tax.
Taxes are very important and complex enough that we’ve written more about them in their own section of our docs. More at: WooCommerce Tax Settings.
Shipping Settings
↑ Back to topGo to: WooCommerce > Settings > Shipping.
Shipping Zones
↑ Back to topThe main shipping settings screen is for Shipping Zones. Think of a shipping zone as a geographic region where a certain set of shipping methods and their rates apply.
You can read about setting up shipping zones at: Setting up Shipping Zones
Shipping Options
↑ Back to top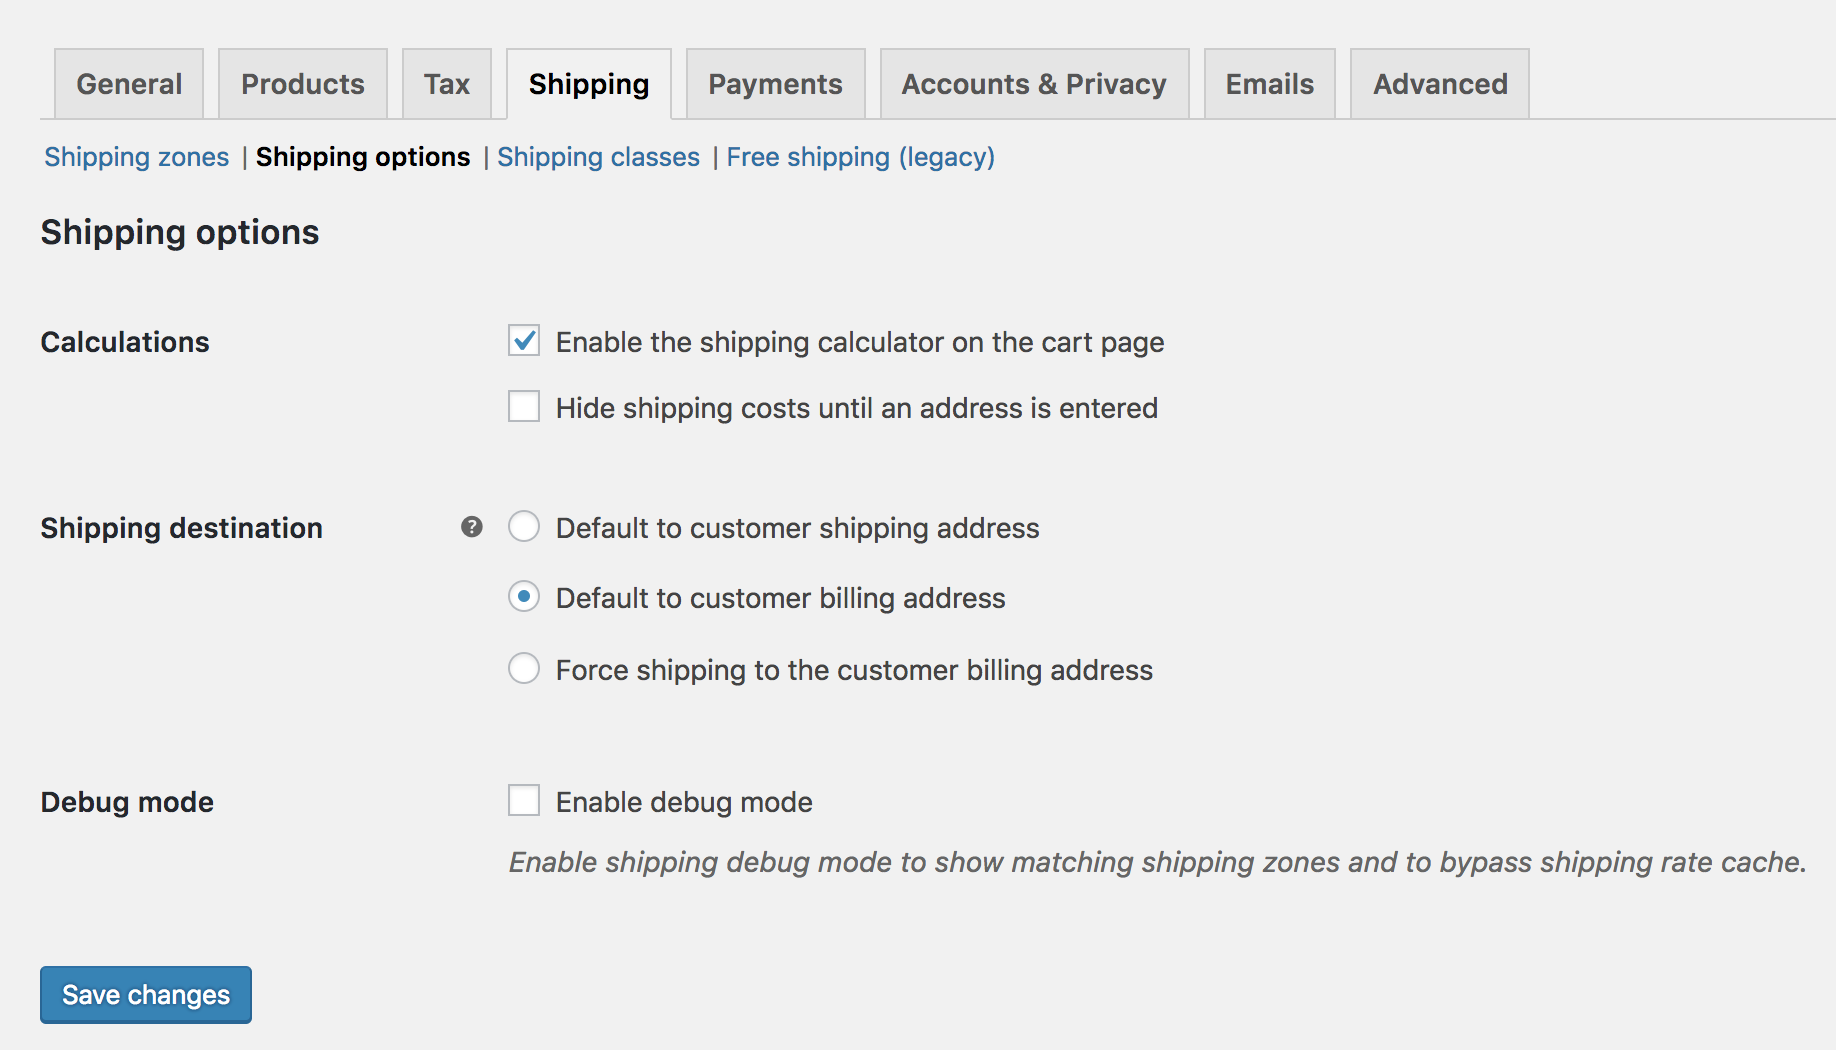
Calculations
- Enable the shipping calculator on the cart page
- Hide shipping costs until an address is entered
Shipping Destination
Ship to billing address or customer shipping address by default or only ship to the user’s billing address.
Debug Mode
Enable for troubleshooting purposes.
Payments Settings
↑ Back to topGo to: WooCommerce > Settings > Payments to control which payment gateways are enabled.
Installed gateways are listed and can be dragged and dropped to control the order in which they display to customers on the checkout.
Clicking the name of the payment gateway will take you directly to a screen to set up or adjust your settings.
Another way to configure settings is to select Set Up or Manage. You can also use the Enabled toggle to turn a gateway on or off:
If you try to enable a payment method that needs extra configuration, it will redirect you to the payment methods setup screen.
More information about:
Accounts and Privacy Settings
↑ Back to topGo to WooCommerce > Settings > Accounts and Privacy to control options relating to customer accounts and data retention.
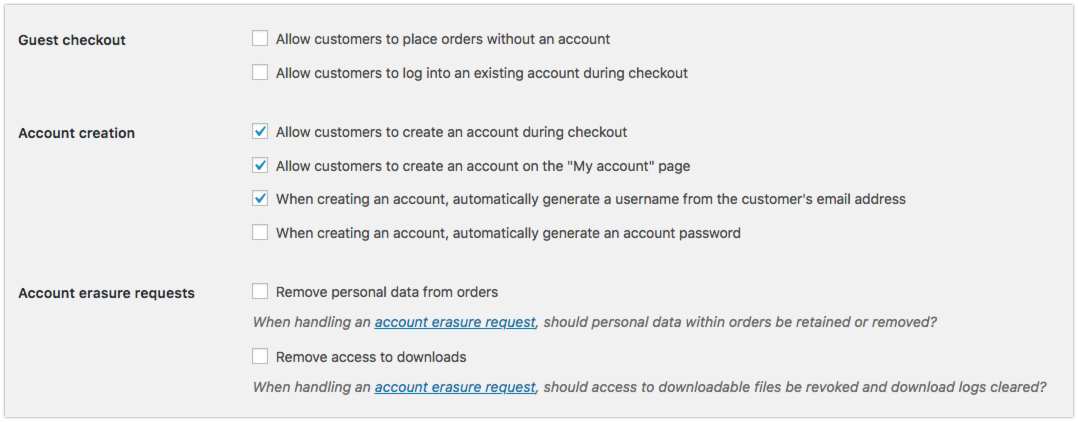
Guest Checkout
- Allow customers to place orders without an account – Allows customers to check out without creating an account. Orders will not be tied to a user account in WordPress.
- Allow customers to log into an existing account during checkout – This displays a login form and prompt on the checkout page if the customer is not already logged in.
Account Creation
- Allow customers to create an account during checkout
- Allow customers to create an account on the My account page
- Automatically generate username from customer email – If this is disabled, there will be an input box for the user to create their own username.
- Automatically generate customer password – If this is disabled, there will be an input box for the user to set their own password. Note that while the password strength notification will be displayed at Checkout, customers can choose any password so as to not limit conversions. On the My Account page, the password will need to meet certain complexity requirements (i.e. a combination of the number of characters and mixture of uppercase / lowercase / numeric / symbol characters).
Account erasure requests
- Remove personal data from orders – WordPress 4.9 allows you to remove personal data on request. When doing this, if you enable this option, user data will also be removed from your orders if they belong to the user being erased.
- Remove access to downloads – WordPress 4.9 allows you to remove personal data on request. When doing this, if you enable this option, download data will also be removed if it belongs to the user being erased. The erased user will no longer have access to any purchased downloads if this happens.
Personal data removal
- Allow personal data to be removed in bulk from orders – Adds a new bulk action to remove personal data on the Orders page. Useful if you need to manually anonymize orders in bulk. See more about this feature on the Managing Orders Document
Privacy policy
↑ Back to topThis section lets you select a page for your privacy policy, and display privacy policy snippets on your account and checkout pages shown to customers.
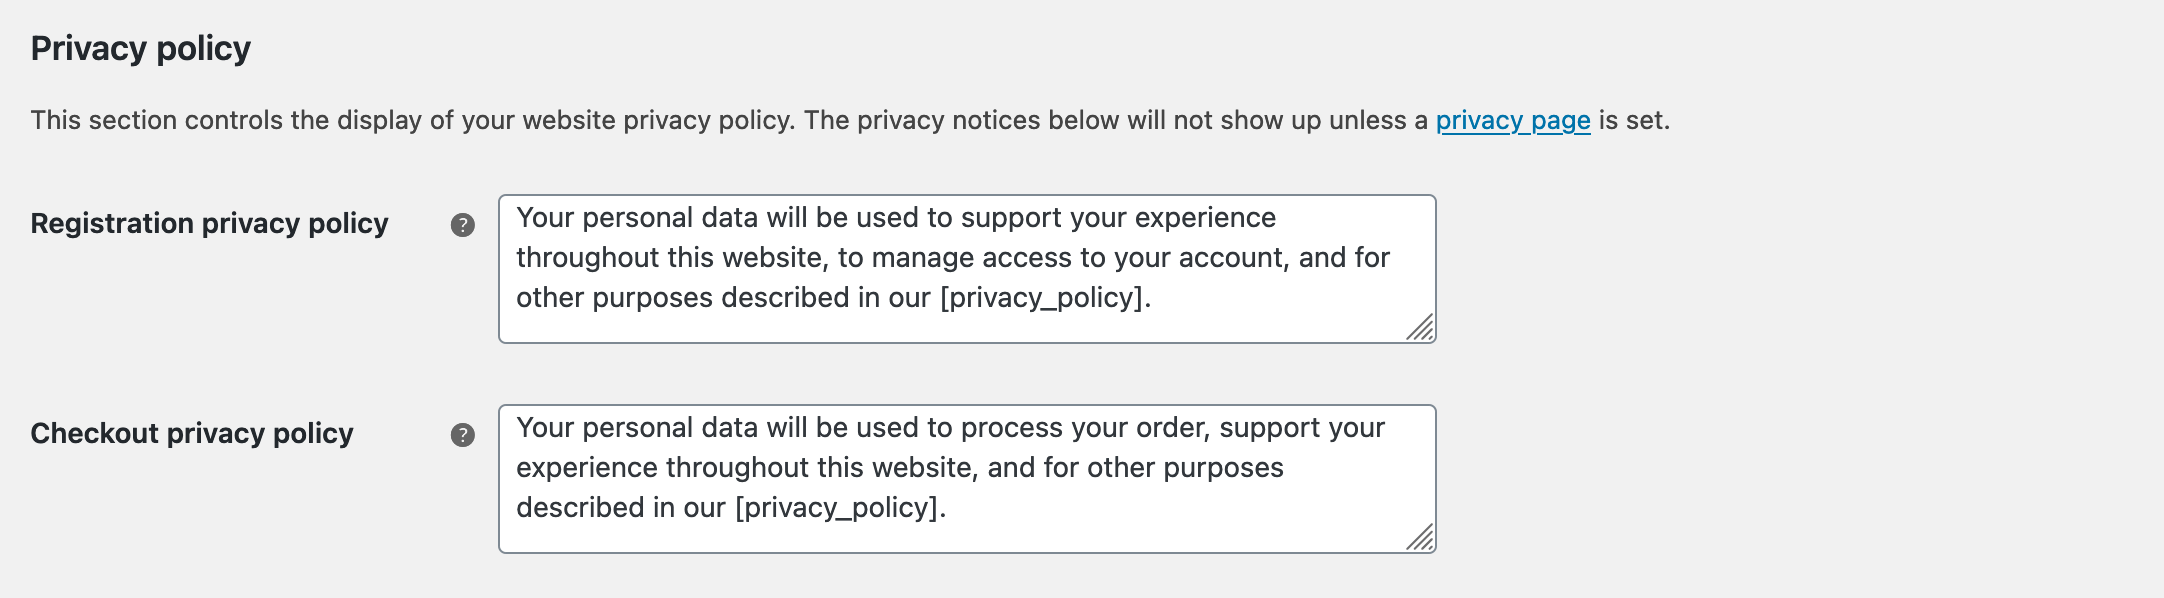
- Privacy Page – Select a page to act as your privacy policy. Using [privacy_policy] will link to this page. Some themes also use this option to link to a privacy policy in other places, such as the footer. This feature was added in WordPress 4.9.
- Registration privacy policy – Shown on the registration form on the My Account page. You should include information about your privacy policy, and link to your page privacy policy page for more information.
- Checkout privacy policy – Shown on the checkout form. You should include information about your privacy policy, and link to your page privacy policy page for more information.
Personal data retention
↑ Back to topThis section allows you decide how long to keep order data on your store. You should specify how long your site will retain data in your privacy policy; consider what makes sense for local laws such as the EU GDPR. These settings were added in WooCommerce 3.4.
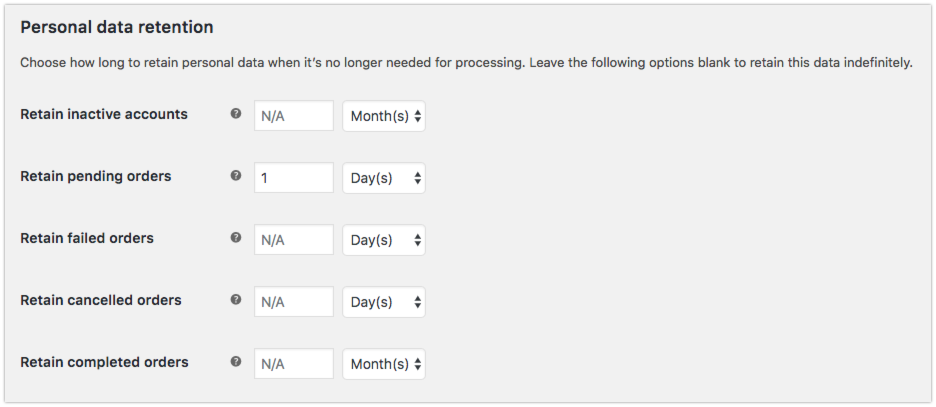
For each option, enter a number and choose the duration from days, weeks, months, or years. Leaving these options blank will retain that data indefinitely.
- Retain inactive accounts – Inactive accounts are accounts which have not logged in nor placed an order for the specified duration.
- Retain pending orders – Pending orders are unpaid or abandoned and should not need to be fulfilled.
- Retain failed orders – Failed orders are unpaid or abandoned and should not need to be fulfilled.
- Retain cancelled orders – Cancelled orders were orders cancelled on purpose by either the admin or the customer, or timed out waiting for payment.
- Retain completed orders – Completed orders were fulfilled in the past.
If enabled, this cleanup will run via a daily cron job. Inactive accounts are tracked using anonymous metadata, and only subscriber/customer accounts are removed.
- Failed, pending, and canceled orders which get cleaned up will be moved to the trash.
- Completed orders which get cleaned up will be anonymized so sales stats are unaffected.
- Inactive accounts will be deleted. An inactive account is one which has not been logged in to, or which has not placed orders, for the specified time.
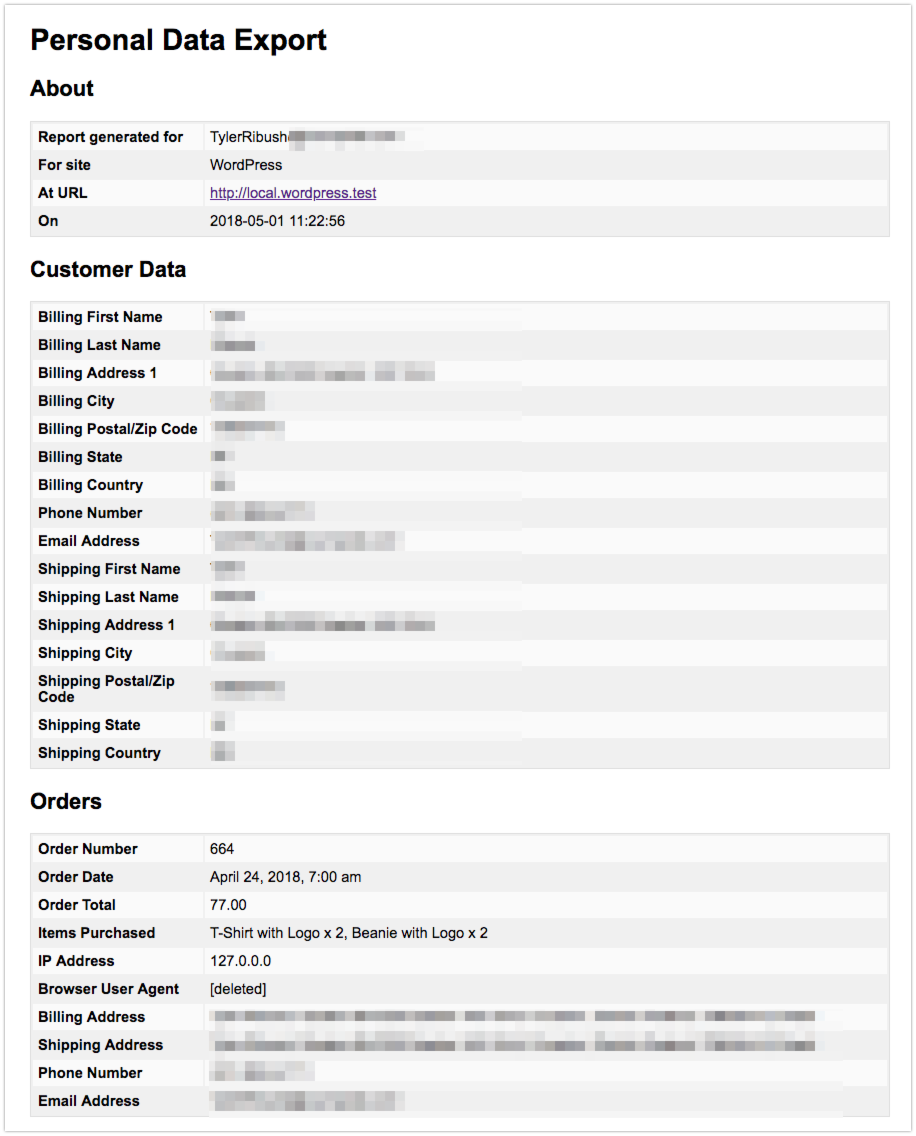
Personal Data Exporter
WordPress 4.9.6 has the ability to export personal data associated with an email address to an HTML file. WooCommerce adds to the generated export file, exporting the following data:
- Customer address/account information
- Orders associated with the given email address
- Download permissions and logs associated with the given email address
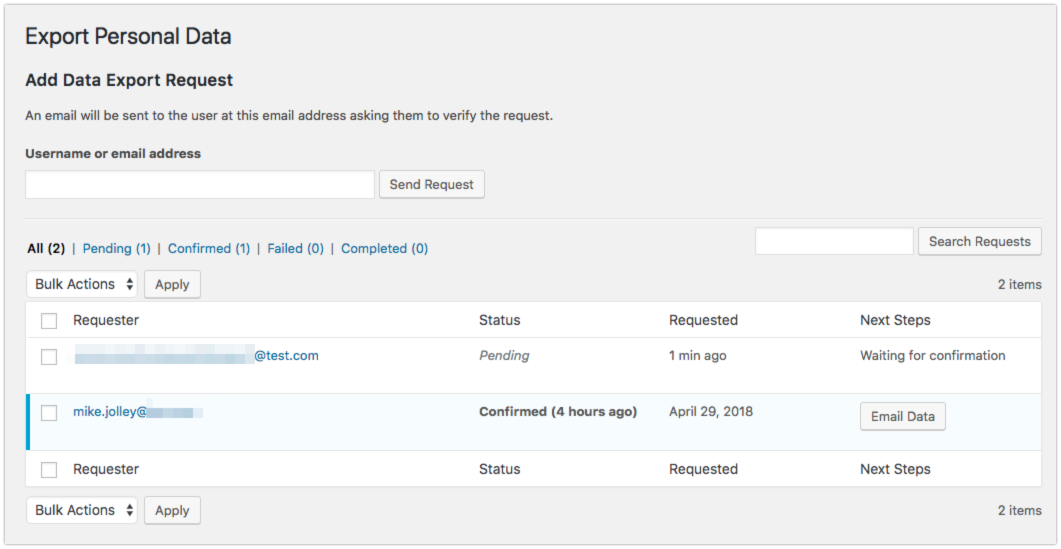
To ensure requests are genuine, a confirmation email is sent to verify the request. The verification process:
- Enter an email address or username.
- User is notified via email with a confirmation link.
- Confirmation link is used, and request is marked “confirmed.”
- Email with link to download their personal data is sent to the user.
Example of a Personal Data File:
Email Settings
↑ Back to topOptions available to edit email settings and templates.
Go to: WooCommerce > Settings > Emails.
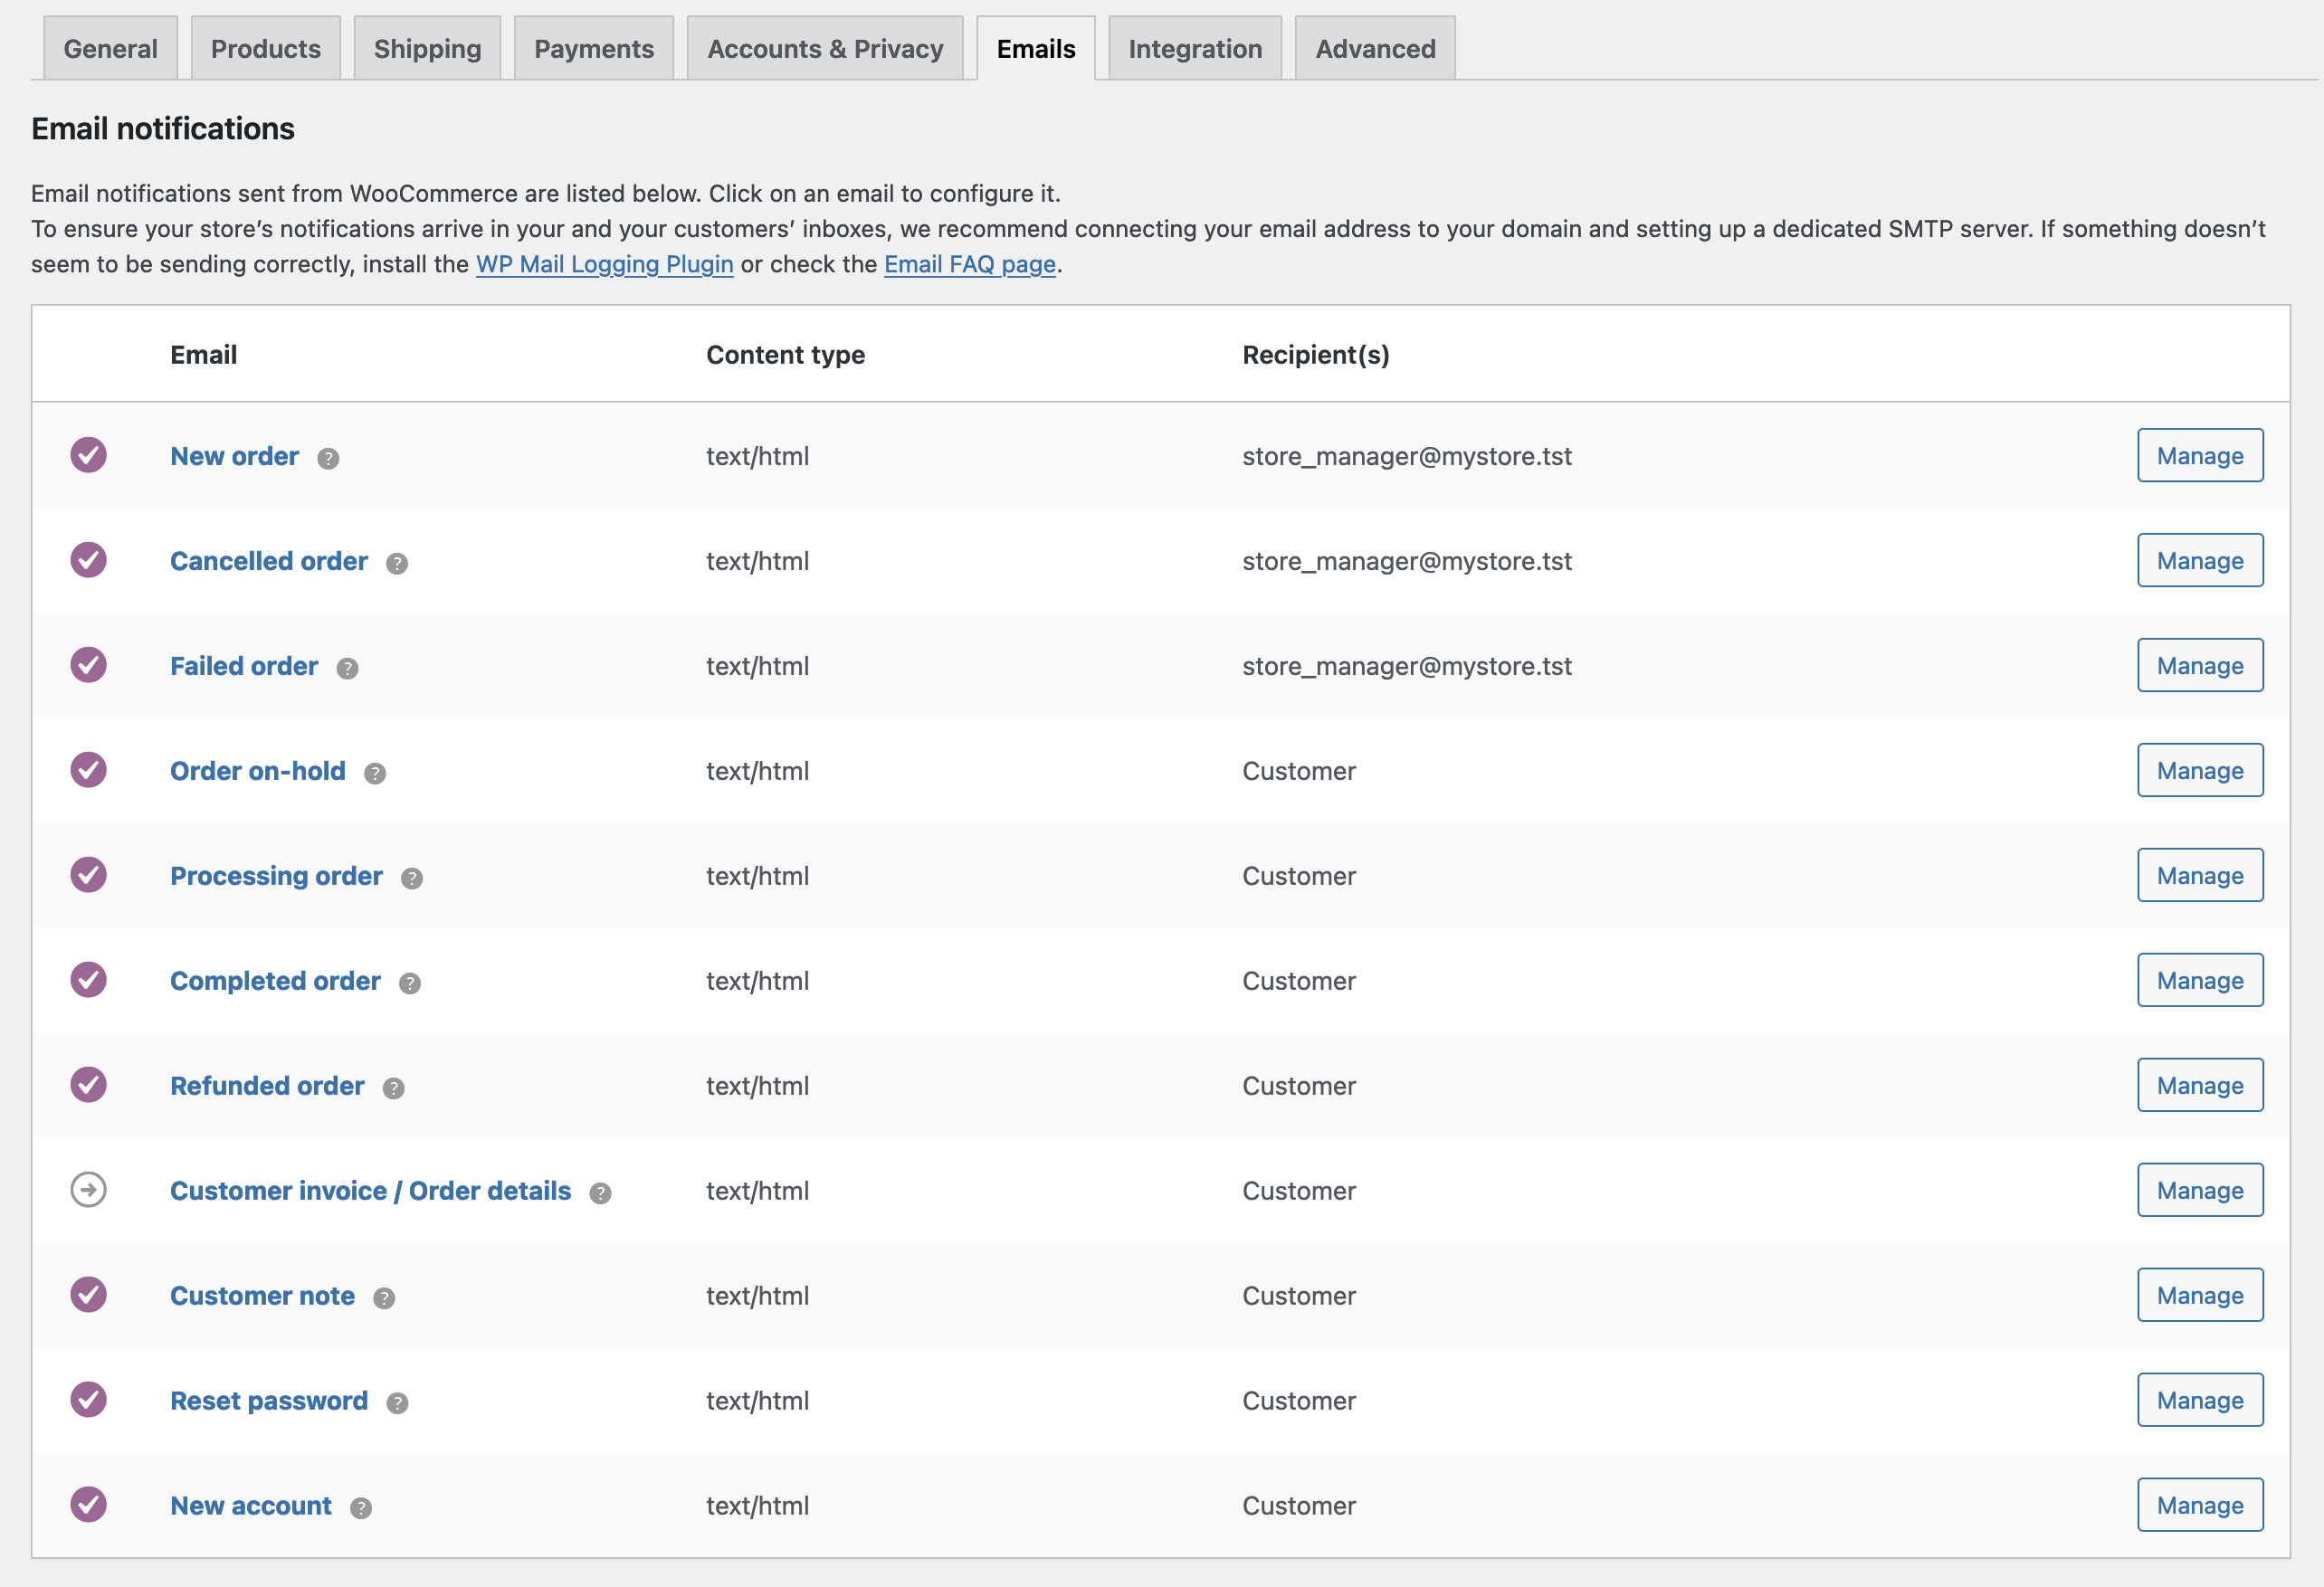
Email notifications
↑ Back to topFor each WooCommerce email listed, it’s possible to configure your settings (optional). More detailed instructions below in: Editing Individual Email Templates.
Email Sender Options
↑ Back to topSet the ‘From’ name and email address for the sender.
Email Templates
↑ Back to topThis section lets you customize WooCommerce emails.
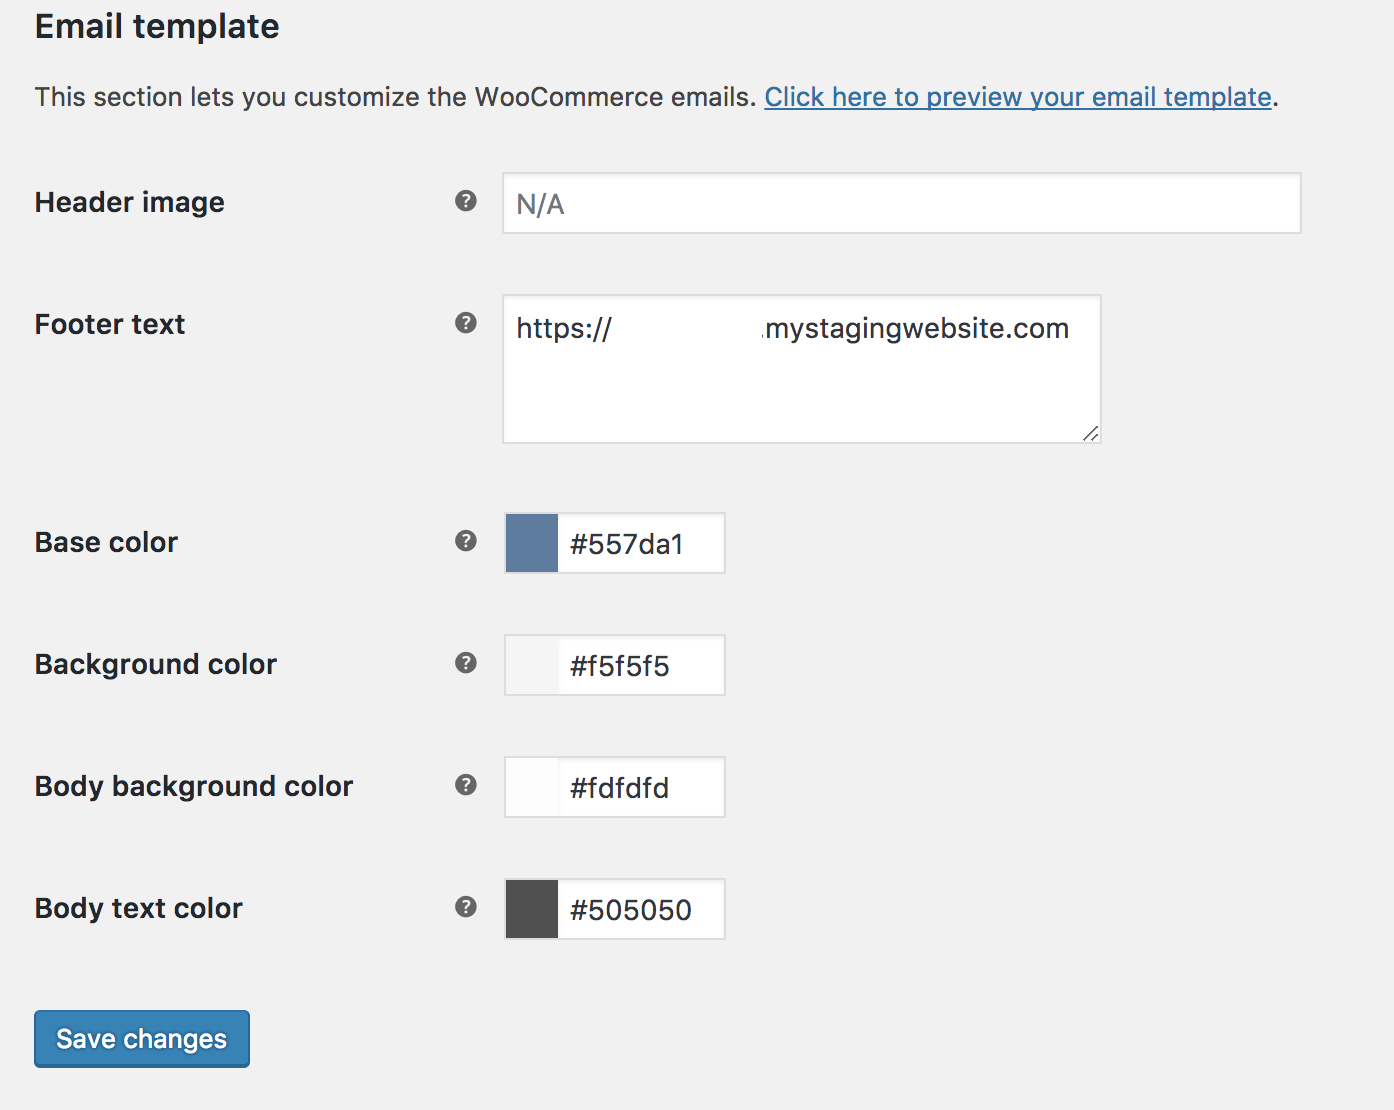
Header Image
Enter the URL of an image you want to show in the email header. You can upload an image via the Add Media button or Media > Add New.
Email and Text
- Base Color – Color for WooCommerce email templates.
- Background Color – Background color for WooCommerce email templates.
- Email Body Background Color – Main body background color.
- Email Body Text Color – Main body text color.
For more advanced control, copy the woocommerce/templates/emails/ folder to yourchildtheme/woocommerce/emails/.
We recommend keeping customizations in a child theme, so changes are not overwritten when performing updates More at: How to set up and use a child theme.
Editing Individual Email Templates
↑ Back to topIn the list above in Email Notifications are these templates:
New order | Cancelled order | Failed order | Processing order | Completed order | Refunded order | Customer invoice | Customer note | Reset password | New account
Select Manage on the right side, and a new screen appears.
New order
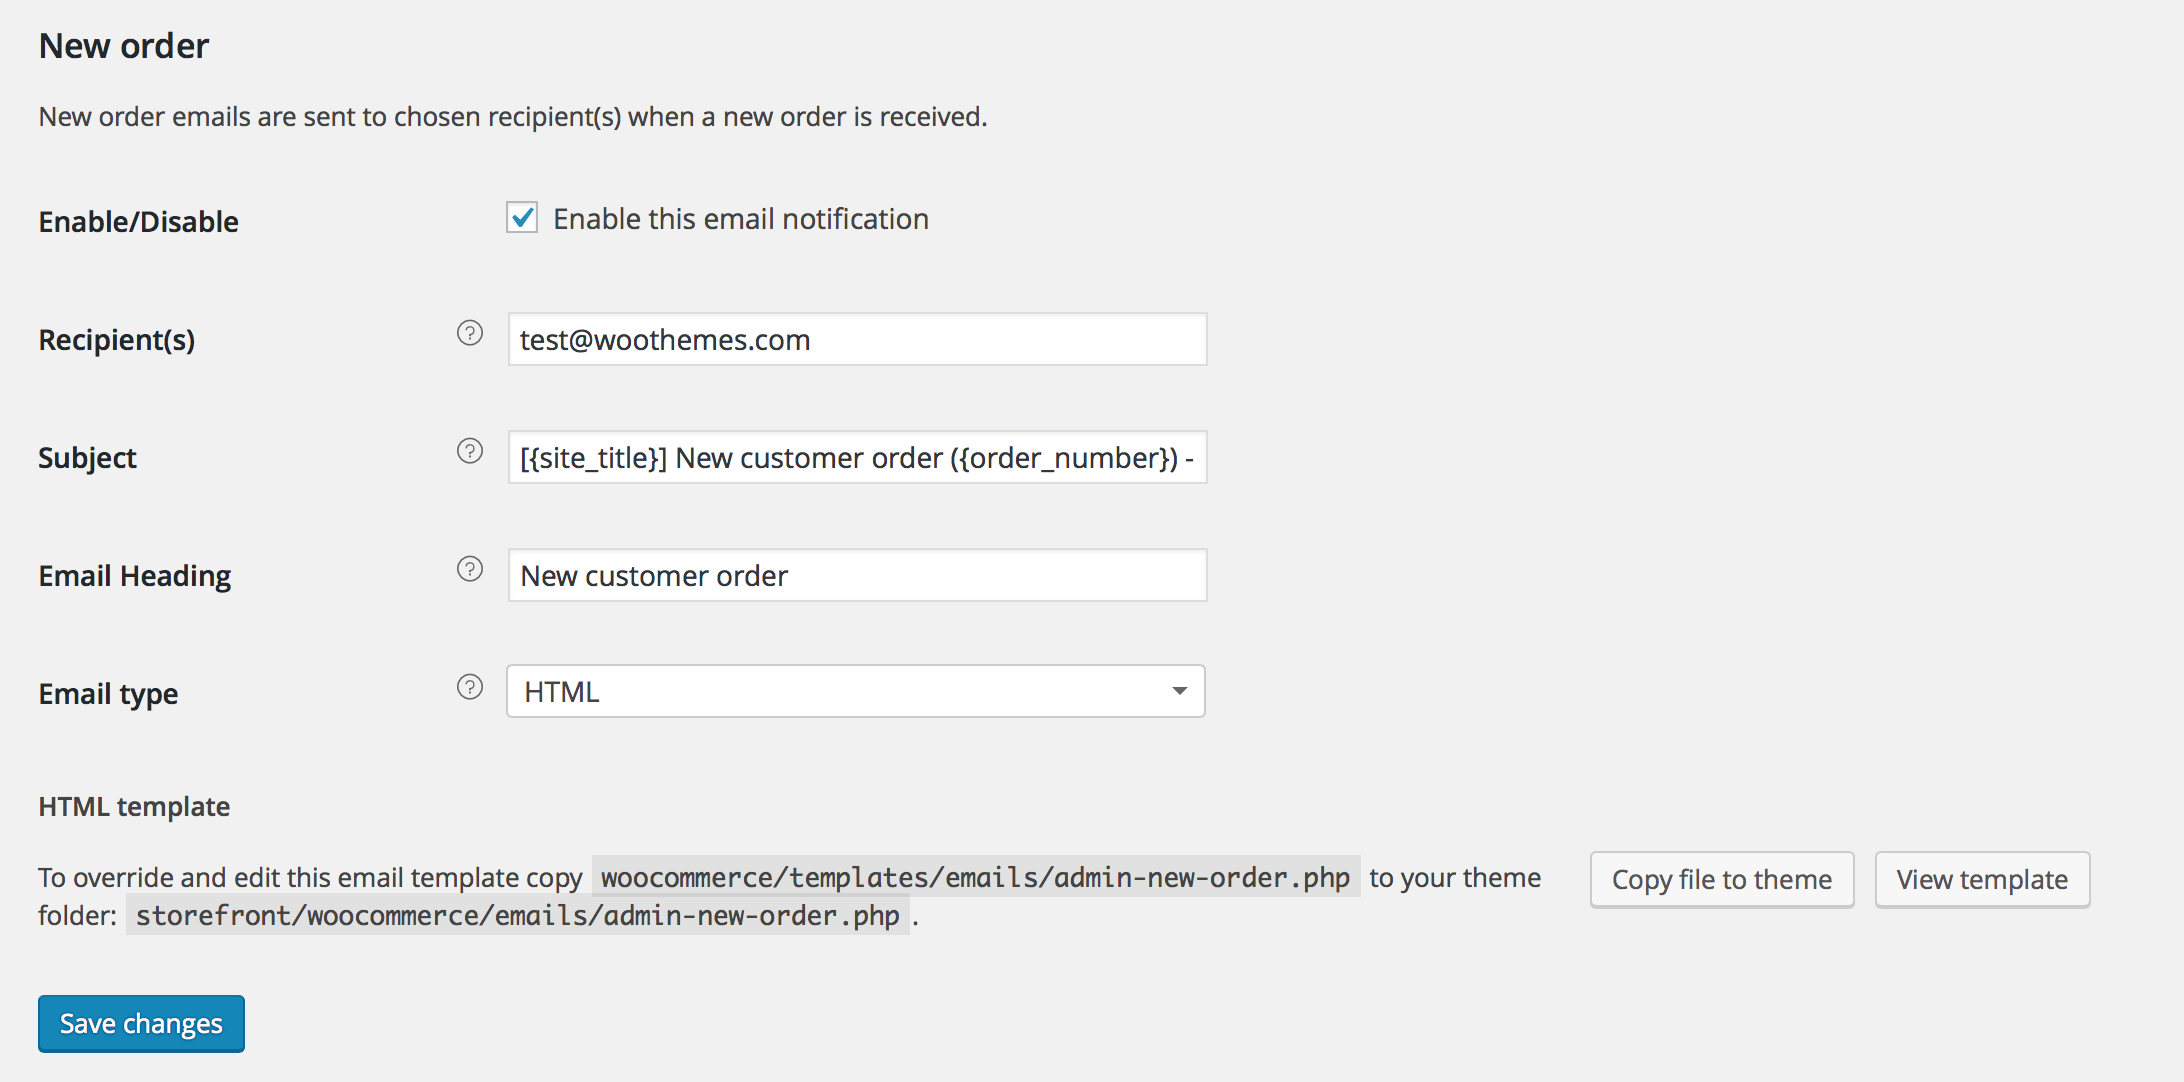
Select options or enter preferences:
Enable/Disable
Enable this email notification.
Recipient(s)
Enter recipients (comma separated) for this email. Defaults to info@woocommerce.com.
Subject
This controls the email subject line. Leave blank to use the default subject:
[{site_title}] New customer order ({order_number}) - {order_date}
Email Heading
This controls the main heading contained within the email notification. Leave blank to use the default heading.
Email type
Choose which format of email to send. Options include:
- Plain Text
- HTML
- Multipart
If using Plain Text emails, keep in mind that text fields are limited to 155 characters. If your products have long names and/or numerous variations/add-ons, the field may be truncated.
HTML template
To override and edit this email template, copy woocommerce/templates/emails/admin-new-order.php to your theme folder: yourchildtheme/woocommerce/emails/admin-new-order.php. You can also copy the template file or view it on this setting screen.
Save any changes.
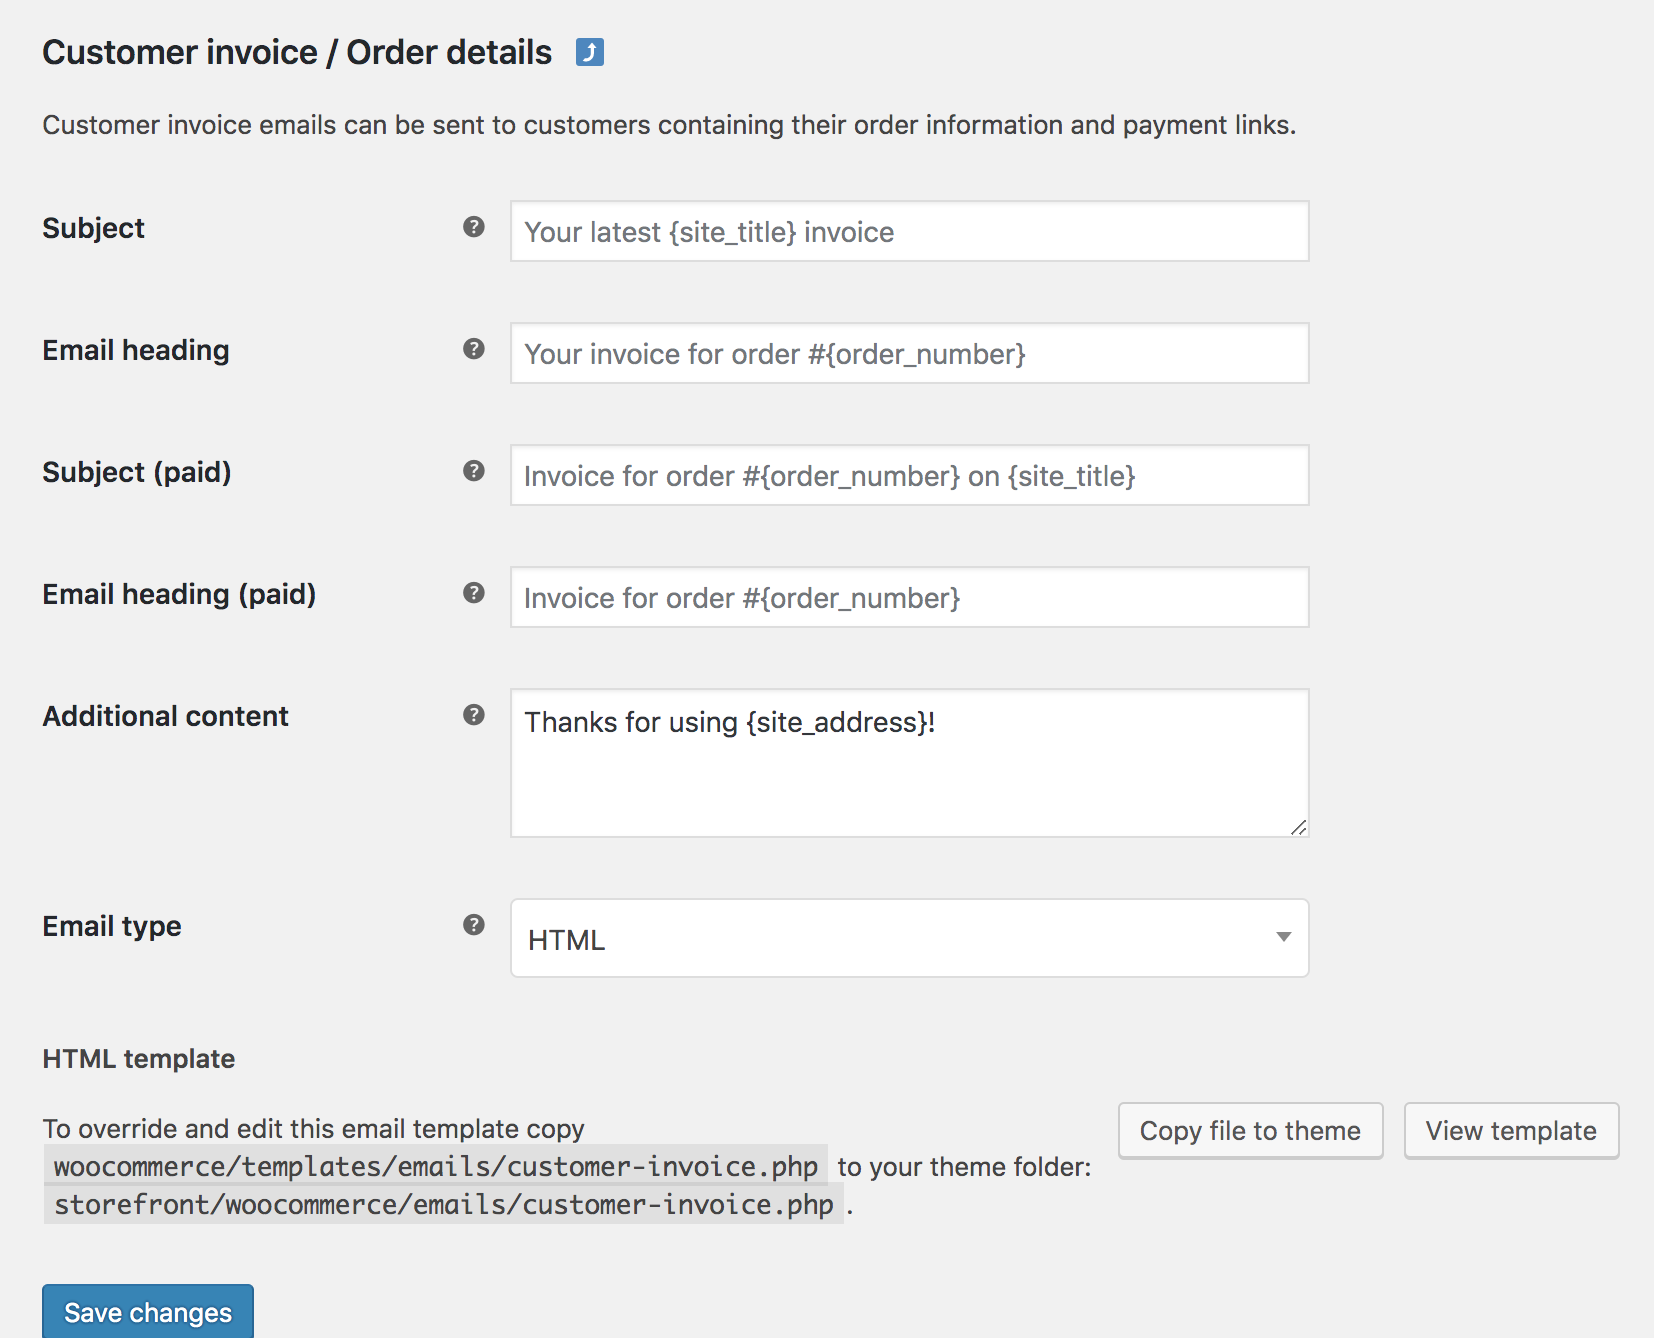
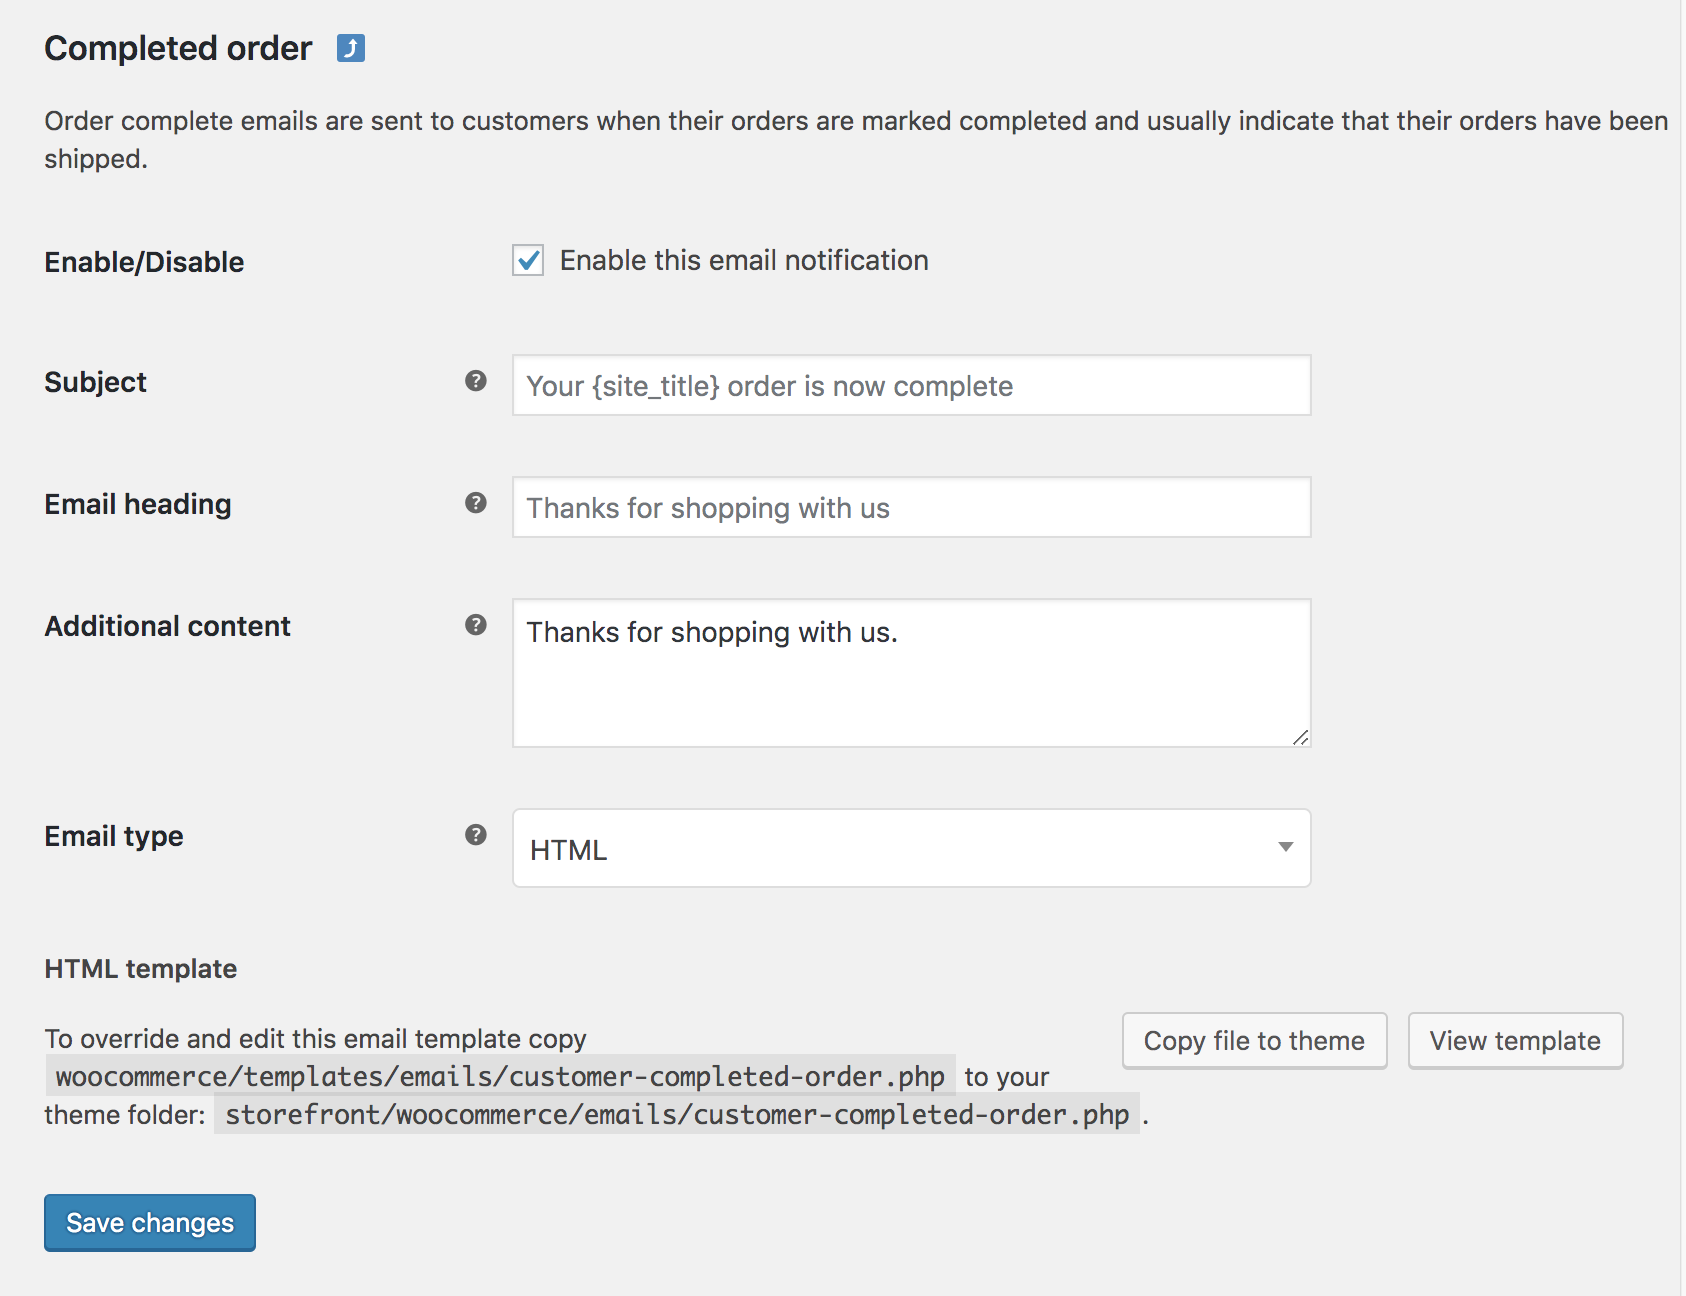
Completed order and Customer invoice / order details
The Completed order and Customer invoice/ Order details templates have slightly different settings from others.
- Customer invoice/Order details cannot (and should not) be disabled.
- Both templates have ‘Thanks’ fields that can be altered.
Advanced Settings
↑ Back to topAdvanced settings allow you to change WooCommerce defaults and integrate with the API. Go to: WooCommerce > Settings > Advanced.
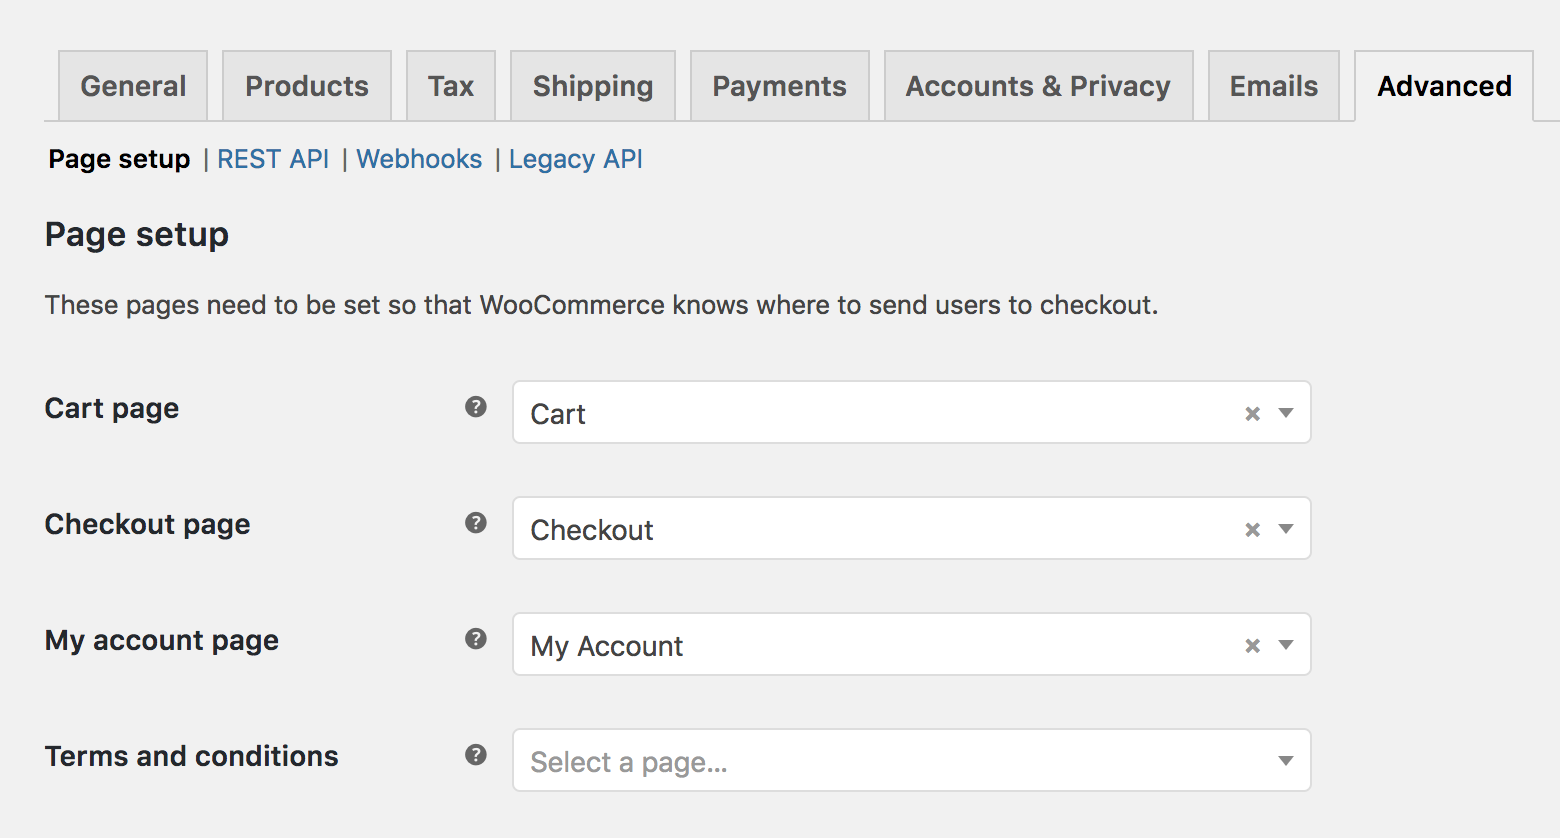
Page Setup
↑ Back to topPages need to be set so WooCommerce knows where to send users to perform certain actions:
- Cart Page – This page shows items in your customers cart.
- Checkout Page – This page is where your customer will enter their payment information and submit orders.
- My Account page – This page is where registered customers will go to view their orders or update their account details.
- Terms and Conditions – This page shows terms and conditions.
You need not use the pages WooCommerce installed, but you must have a page set for the Cart and Checkout pages. Otherwise your customers cannot buy and pay for your products. These pages are normally created and set when installing/setting up WooCommerce.
Terms and conditions
To use a Terms and Conditions page, create a new page for it at Pages > Add New, then select the page in the dropdown. When using the [woocommerce_checkout] shortcode the Terms and Conditions appear inline during checkout, and are displayed when the customer clicks the “Terms & Conditions” link. Then the customer can scroll through content and tick the checkbox to accept.
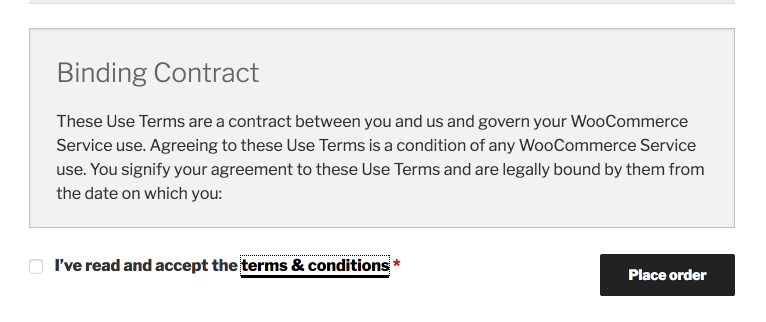
On the Block version of the Checkout, shoppers will see a message saying: “By proceeding with your purchase you agree to our Terms and Conditions and Privacy Policy” with links to the respective pages if they’ve been set. You can edit this message to fit your needs in the block editor.
Checkout Endpoints
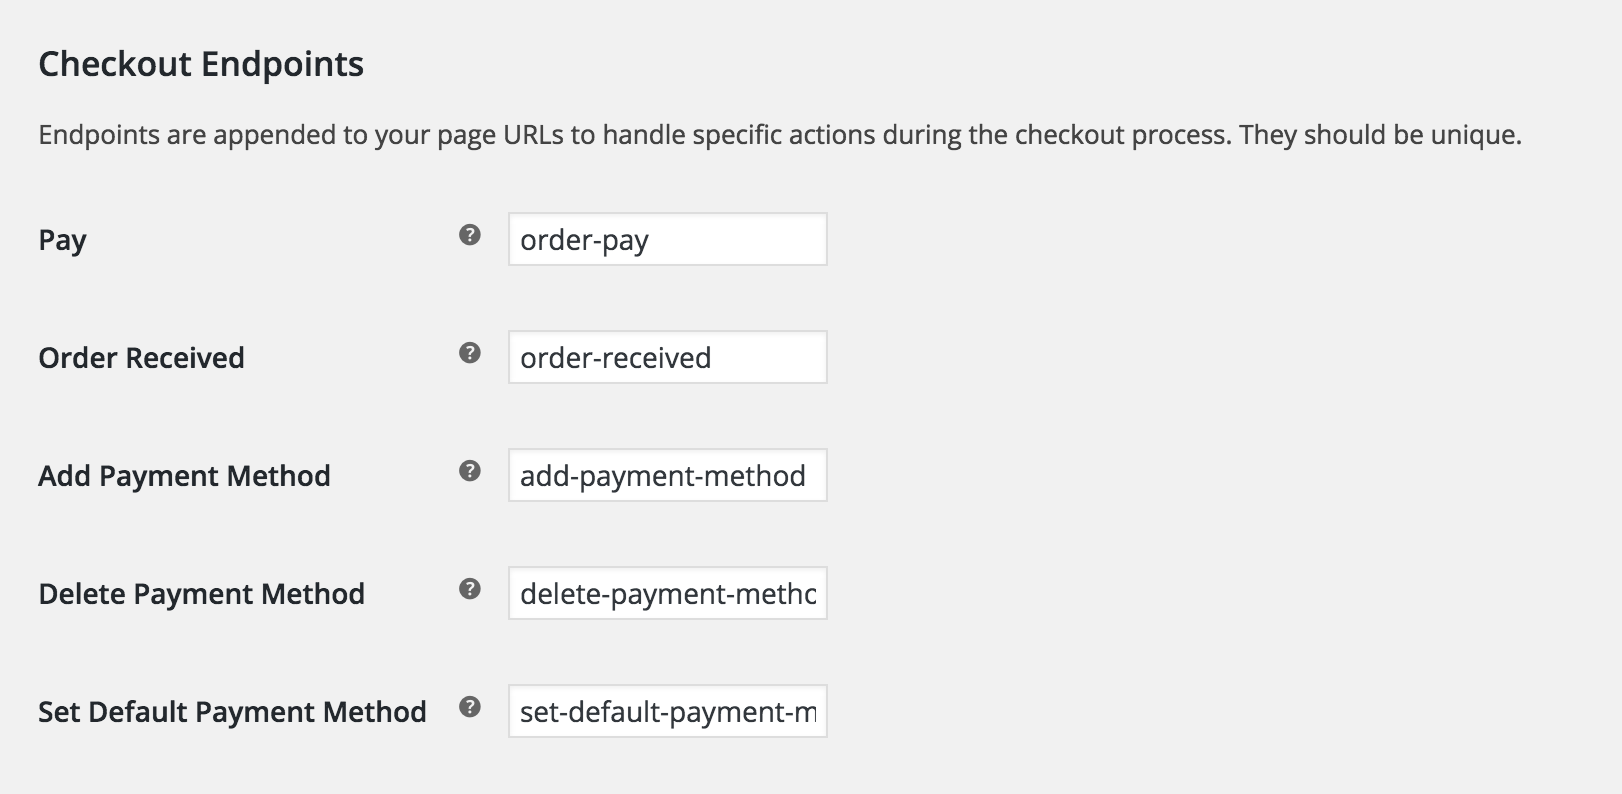
Endpoints are appended to page URLs to handle specific actions during the checkout process. They should be unique. Learn more about WooCommerce endpoints.
My Account Endpoints
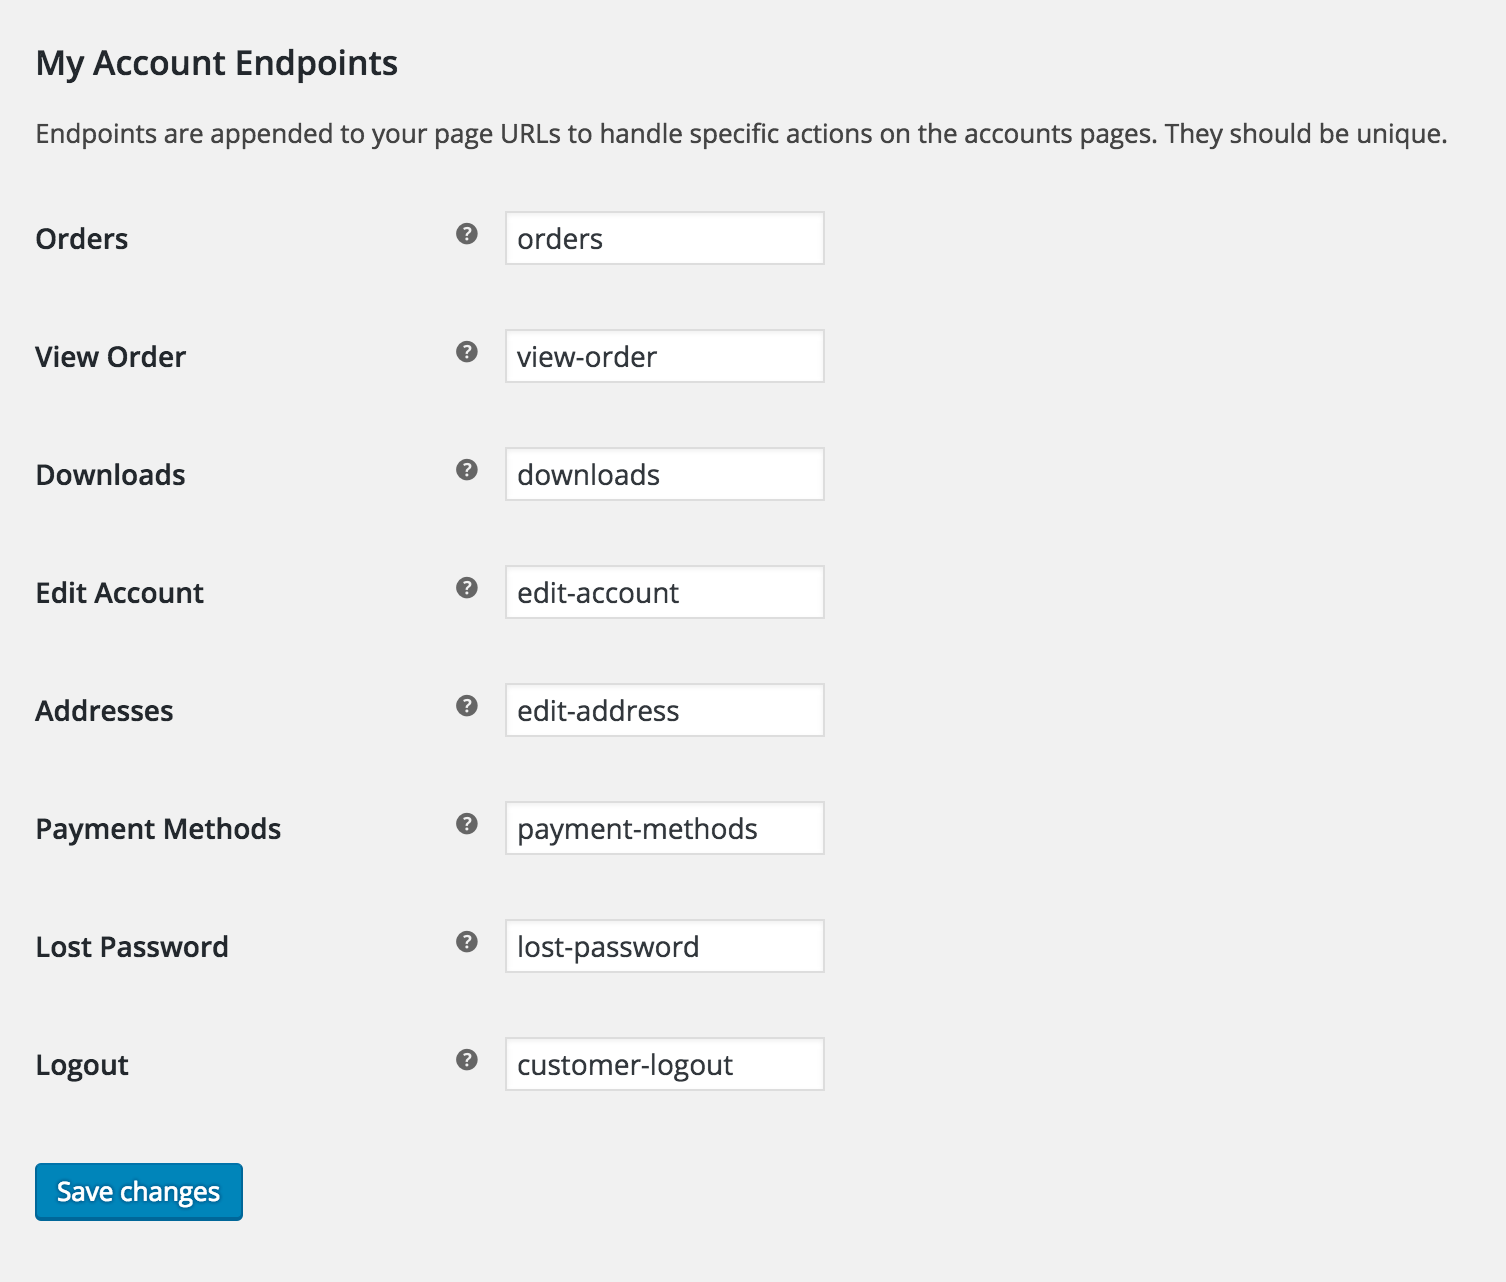
Endpoints are appended to your page URLs to handle specific actions on the accounts pages. They should be unique.
- Orders
- View Order
- Downloads
- Edit Account
- Addresses
- Payment Methods
- Lost Password
- Logout
Learn more about WooCommerce Endpoints.
Rest API
↑ Back to topGo to: WooCommerce > Settings > Advanced > REST API. Here you can create API keys to work with the WooCommerce REST API. More info at: Generate API Keys.
This API is for developers to use. You can enable it to access store data from outside WordPress, e.g., Our iOS app or other external apps. More information at: WooCommerce REST API.
Webhooks
↑ Back to topMore info at: Using WooCommerce Webhooks.
Legacy API
↑ Back to topEnable the Legacy REST API which is no longer maintained.
Features
↑ Back to topTry out the new navigation for WooCommerce! You can enable this by going to WooCommerce > Settings > Advanced > Features:
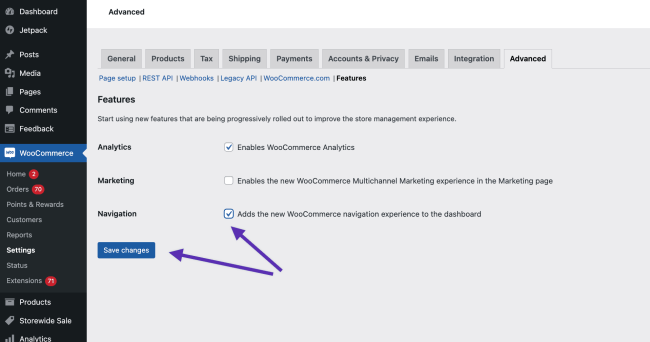
- All of your store management features in one place
- Give your attention to key areas of WooCommerce with little distraction
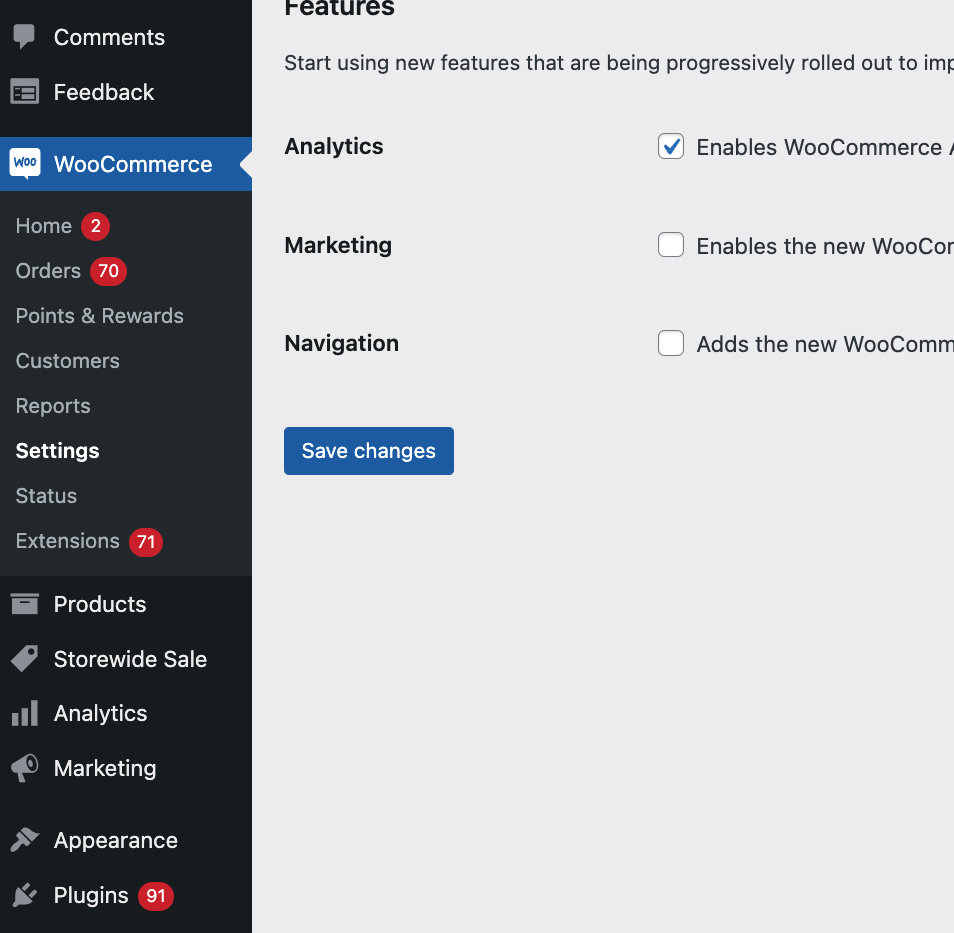
Old navigation for WooCommerce
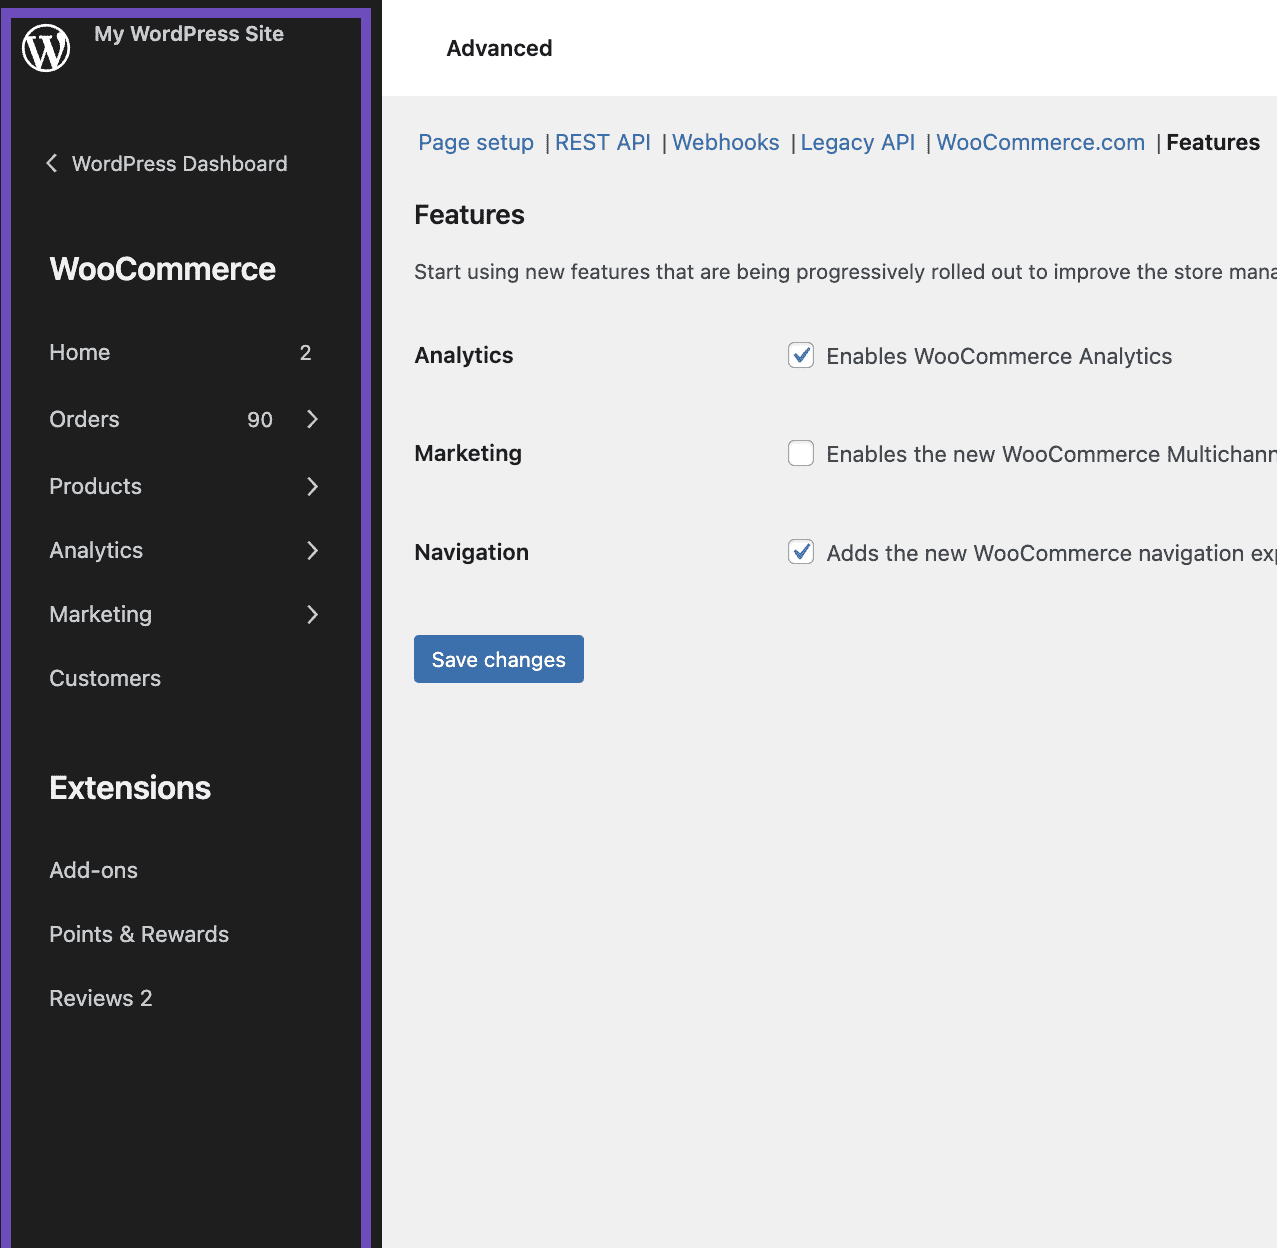
New navigation for WooCommerce
- Easliy find and favorite your extension


Questions and Support
↑ Back to topDo you still have questions and need assistance?
This documentation is about the free, core WooCommerce plugin for which support is provided in our community forums on WordPress.org. Searching there you’ll often find that your question has been asked and answered before.
If you haven’t created a WordPress.org account to use the forums, here’s how.
- If you’re looking to extend the core functionality shown here, we recommend reviewing available extensions in the Woo Marketplace.
- Need ongoing advanced support, or a customization built for WooCommerce? Hire a WooExpert agency.
- Are you a developer building your own WooCommerce integration or extension? Check our Developer Resources.
If you weren’t able to find the information you need, please use the feedback thumbs below to let us know! 🙏